Vestil RR-76-30 Bruksanvisning
Vestil
Ikke kategorisert
RR-76-30
Les nedenfor 📖 manual på norsk for Vestil RR-76-30 (5 sider) i kategorien Ikke kategorisert. Denne guiden var nyttig for 6 personer og ble vurdert med 4.5 stjerner i gjennomsnitt av 3.5 brukere
Side 1/5
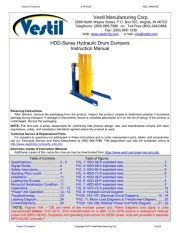
MODEL #
PIT FLOOR WIDTH &
OPENING WIDTH
PIT FLOOR
LENGTH
RR-65/EH-65 80" 53"
RR-66/EH-66 80" 65"
RR-68/EH-68 80" 89"
RR-610/EH-610 80" 113"
RR-75/EH-75 92" 53"
RR-76/EH-76 92" 65"
RR-78/EH-78 92" 89"
RR-710/EH-710 92" 113"
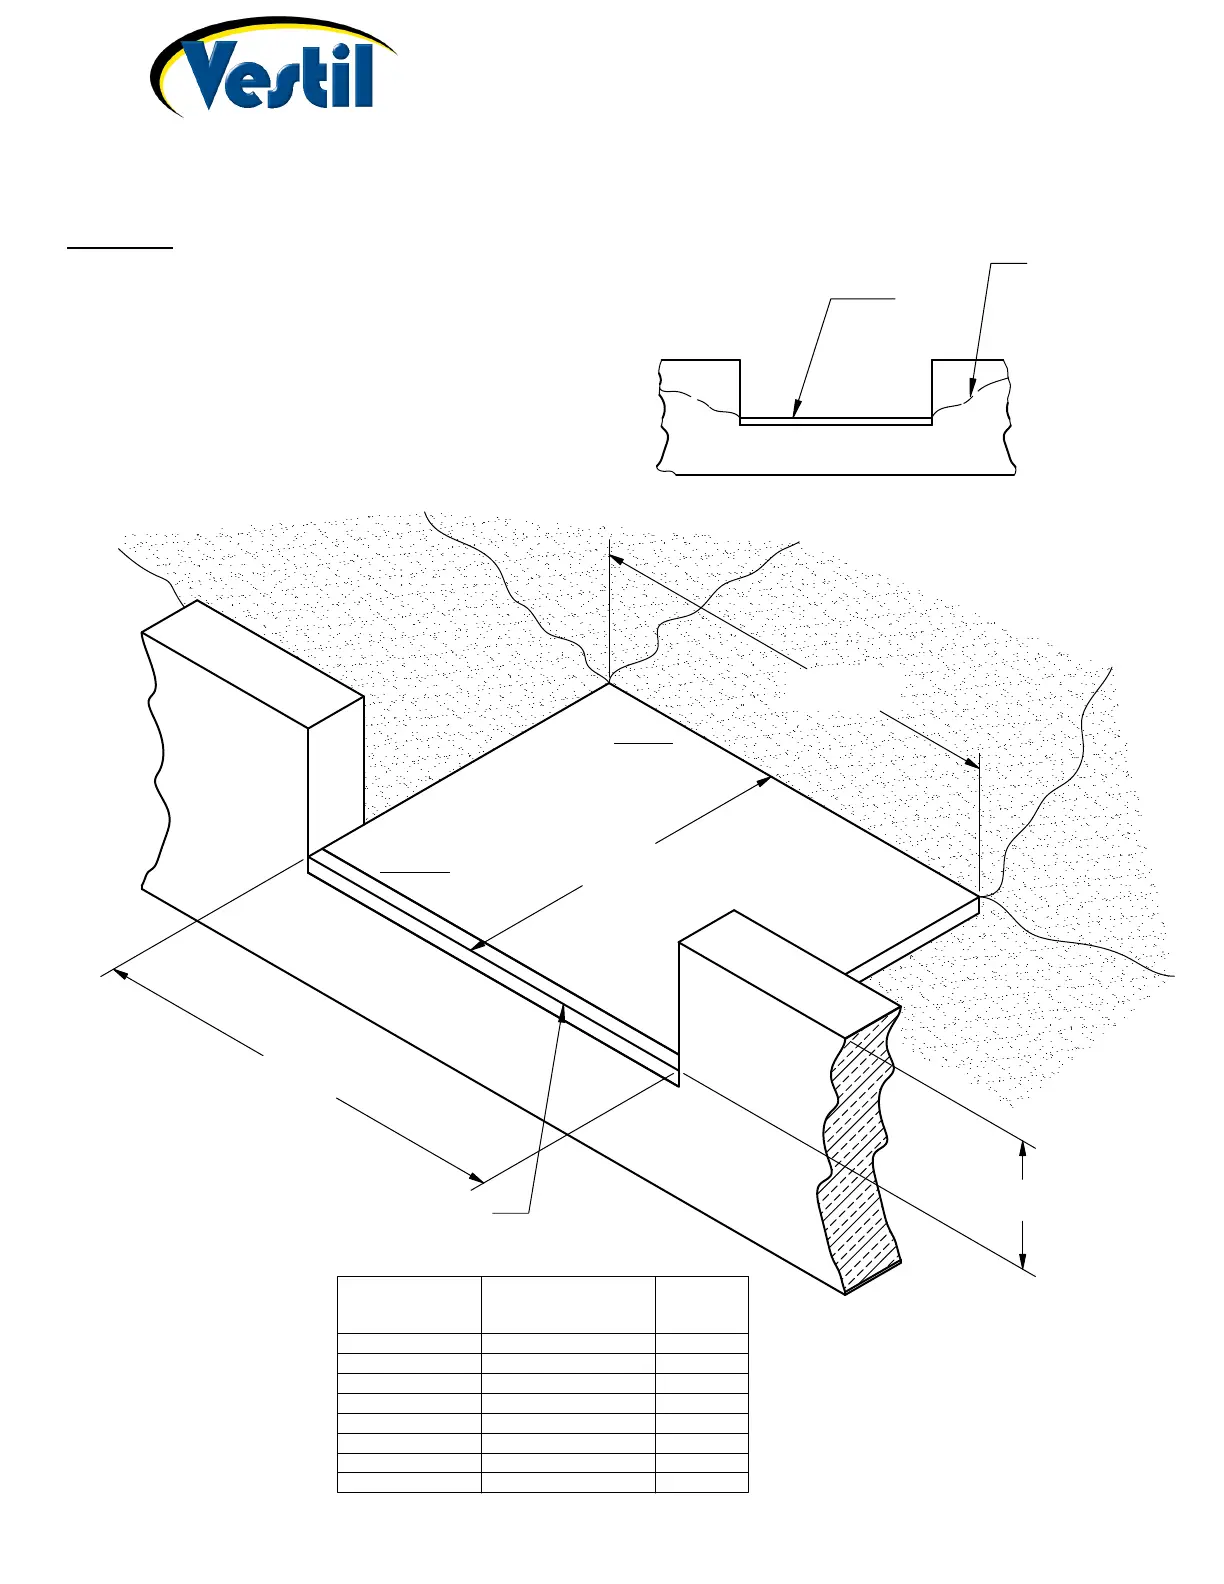
INSTALLING A POUR-IN-PLACE DOCK LEVELER (EH & RR)
Part A: Prepare the Site & Make the Floor
1.) Prepare (concrete) dock wall and pit floor as
shown in the diagrams. Pit floor should taper from
back to front. The front of the pit should be 1/2"
lower than the back. Tapering the floor facilitates pit
cleaning and allows to pit to drain to the outside of
the building.
2.) The installation site should be excavated such
that the rough grade of the area surrounding the pit
slopes gently from the rough grade of the
surrounding floor to the bottom of the pit floor.
DOCK
WALL
FRONT CURB (RECOMMENDED)
(3" x 3" x 1/4" ANGLE WITH "J" ANCHORS)
PIT FLOOR
LENGTH
PIT FLOOR
WIDTH
24" PIT
HEIGHT
OPENING
WIDTH
FRONT
CURB
AREA
SURROUNDING
PIT SHOULD
SLOPE FROM
ROUGH
GRADE OF
FLOOR TO
BOTTOM OF PIT
BACK
FRONT
Vestil Manufacturing Corp.
2999 North Wayne Street, P.O. Box 507, Angola, IN 46703
Telephone: (260) 665-7586 Toll Free (800) 348-0868 Fax: (260) 665-1339
Web: www.vestilmfg.com E-mail: info@vestil.com
Page 1 of 5
Produkspesifikasjoner
| Merke: | Vestil |
| Kategori: | Ikke kategorisert |
| Modell: | RR-76-30 |
Trenger du hjelp?
Hvis du trenger hjelp med Vestil RR-76-30 still et spørsmål nedenfor, og andre brukere vil svare deg
Ikke kategorisert Vestil Manualer
20 Oktober 2025
5 Oktober 2025
5 Oktober 2025
5 Oktober 2025
5 Oktober 2025

4 Oktober 2025

4 Oktober 2025
4 Oktober 2025
4 Oktober 2025
4 Oktober 2025
Ikke kategorisert Manualer
- Hamilton Beach
- Ozito
- Applico
- Turmix
- SHX
- Foppapedretti
- BirdDog
- Carel
- Lowel
- EmberGlo
- FSR
- Melchioni
- Peerless-AV
- (Recovery)
- Ednet
Nyeste Ikke kategorisert Manualer

23 Oktober 2025

23 Oktober 2025

23 Oktober 2025

23 Oktober 2025

23 Oktober 2025

23 Oktober 2025

23 Oktober 2025

23 Oktober 2025

23 Oktober 2025

23 Oktober 2025