Whirlpool WOI68HU0SXA Bruksanvisning
Les nedenfor 📖 manual på norsk for Whirlpool WOI68HU0SXA (48 sider) i kategorien ovn. Denne guiden var nyttig for 6 personer og ble vurdert med 5.0 stjerner i gjennomsnitt av 3.5 brukere
Side 1/48
EN
Owner's Manual
THANK YOU FOR BUYING A WHIRLPOOL PRODUCT
In order to receive a more complete assistance, please
register your product on www.register10.eu
Before using the appliance carefully read the Safety
Instruction.
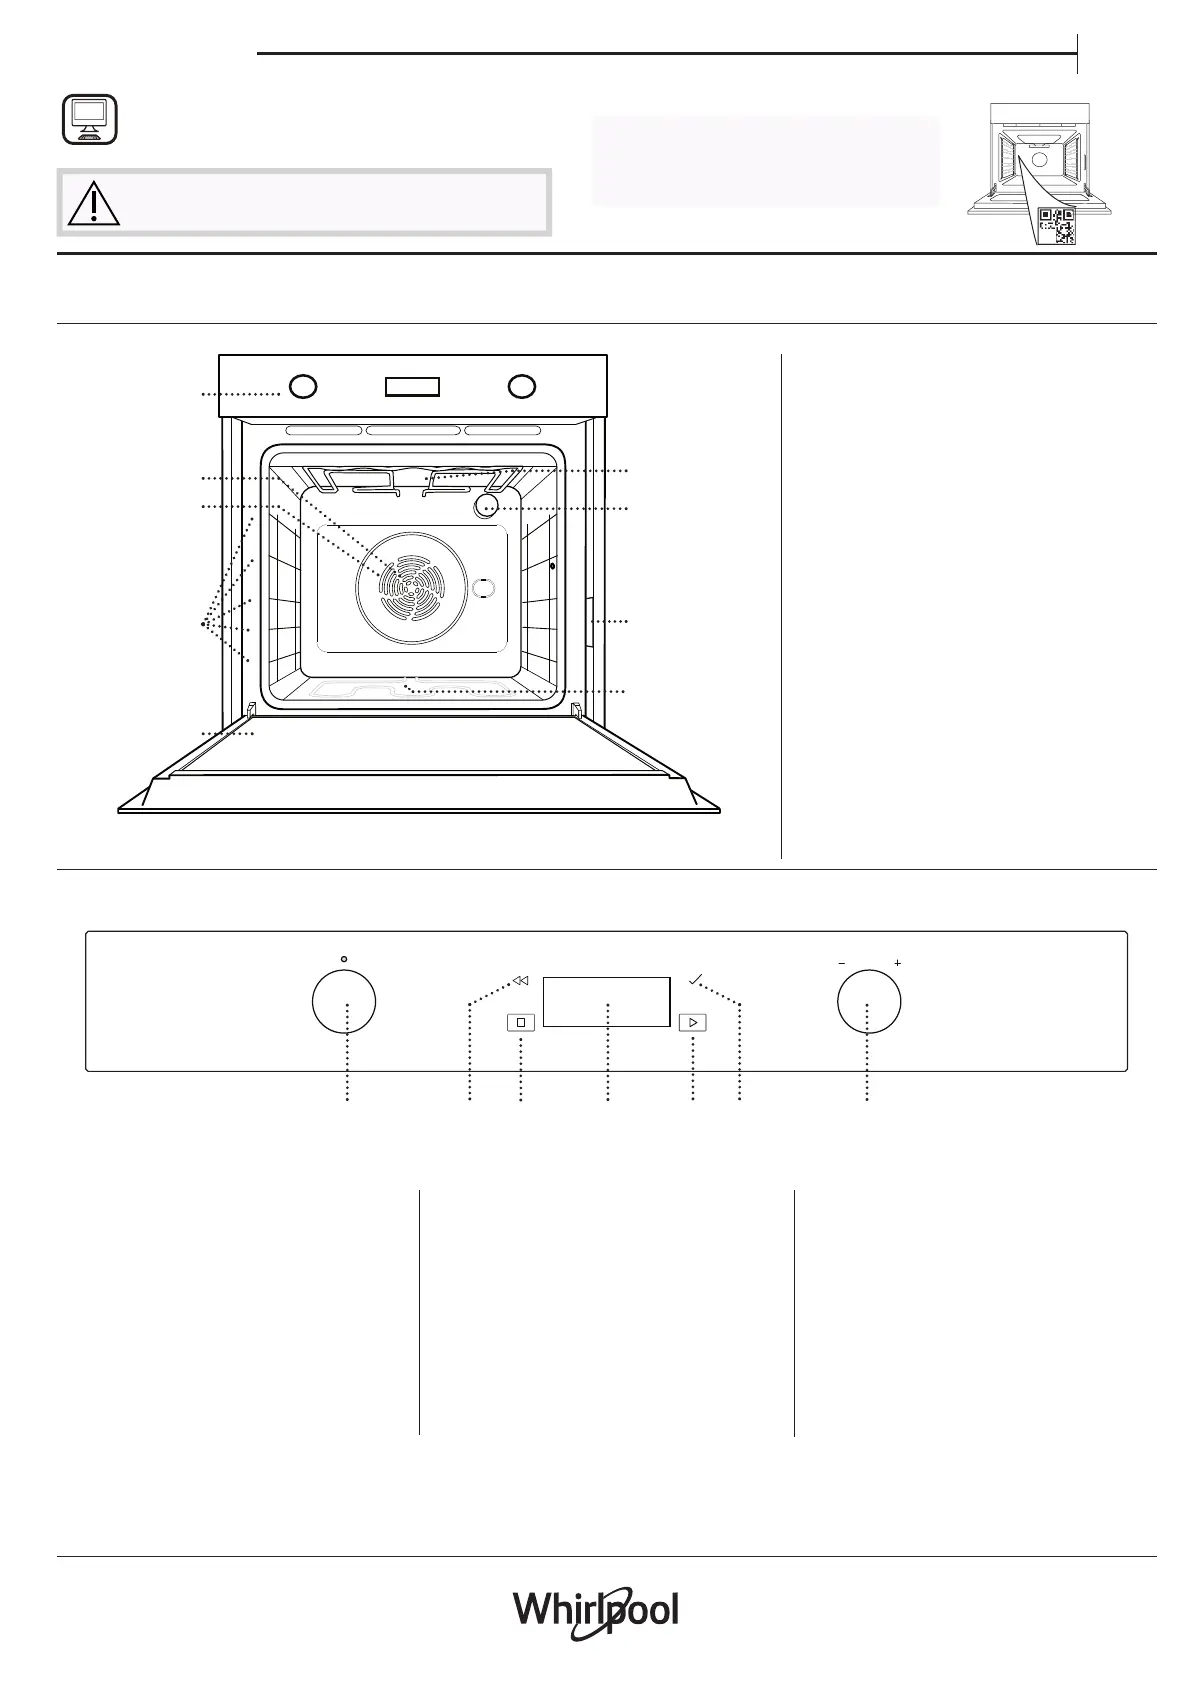
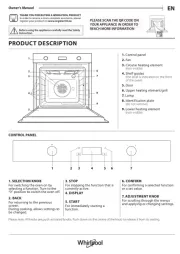
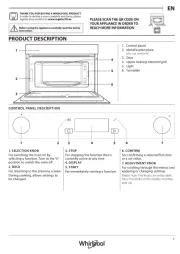
PRODUCT DESCRIPTION
CONTROL PANEL
1. Control panel
2. Fan
3. Circular heating element
(non-visible)
4. Shelf guides
(the level is indicated on the front
of the oven)
5. Door
6. Upper heating element/grill
7. Lamp
8. Identification plate
(do not remove)
9. Lower heating element
(non-visible)
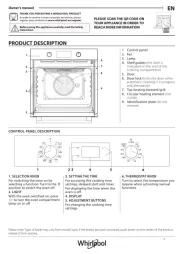
1. SELECTION KNOB
For switching the oven on by
selecting a function. Turn to the
“0” position to switch the oven off.
2. BACK
For returning to the previous
screen.
During cooking, allows settings to
be changed.
3. STOP
For stopping the function that is
currently active.
4. DISPLAY
5. START
For immediately starting a
function.
6. CONFIRM
For confirming a selected function
or a set value.
7. ADJUSTM E NT K NO B
For scrolling through the menus
and applying or changing settings.
5
4
3
2
1
5
4
3
2
1
1
2
3
4
5
8
9
7
6
1 2 3 4567
Please note: All knobs are push-activated knobs. Push down on the centre of the knob to release it from its seating.
PLEASE SCAN THE QR CODE ON
YOUR APPLIANCE IN ORDER TO
REACH MORE INFORMATION
Produkspesifikasjoner
| Merke: | Whirlpool |
| Kategori: | ovn |
| Modell: | WOI68HU0SXA |
Trenger du hjelp?
Hvis du trenger hjelp med Whirlpool WOI68HU0SXA still et spørsmål nedenfor, og andre brukere vil svare deg
ovn Whirlpool Manualer
6 Oktober 2025

5 Oktober 2025
4 Oktober 2025
4 Oktober 2025
4 Oktober 2025
31 August 2025
21 August 2025

16 August 2025
16 August 2025

16 August 2025
ovn Manualer
- Rommelsbacher
- Arcelik
- Asko
- Rommer
- Avanti
- KitchenAid
- SmokinTex
- Panasonic
- Imperial
- Hendi
- Respekta
- Café
- Vulcan
- JennAir
- Ilve
Nyeste ovn Manualer
23 Oktober 2025

21 Oktober 2025

20 Oktober 2025

19 Oktober 2025

18 Oktober 2025

18 Oktober 2025

18 Oktober 2025

17 Oktober 2025
17 Oktober 2025

16 Oktober 2025