Atdec A-STSWW Bruksanvisning
Atdec
Ikke kategorisert
A-STSWW
Les nedenfor 📖 manual på norsk for Atdec A-STSWW (6 sider) i kategorien Ikke kategorisert. Denne guiden var nyttig for 6 personer og ble vurdert med 5.0 stjerner i gjennomsnitt av 3.5 brukere
Side 1/6
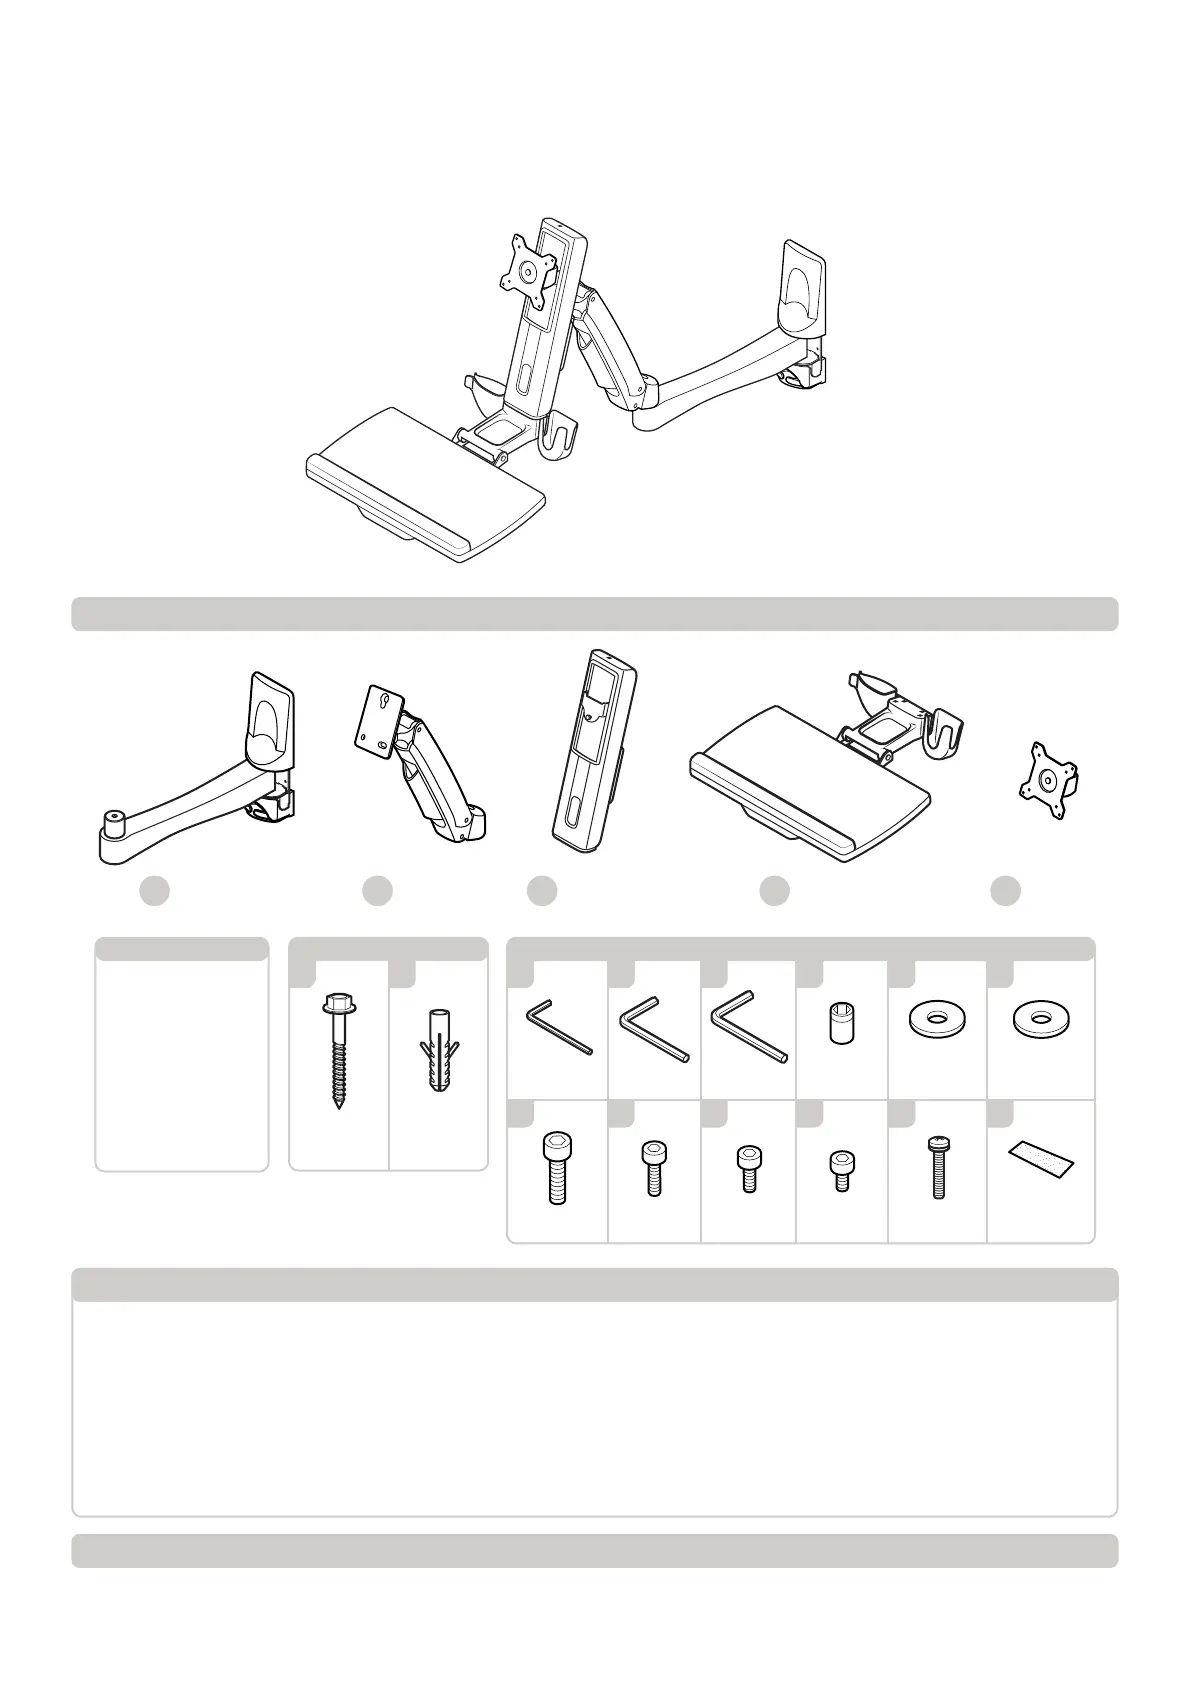
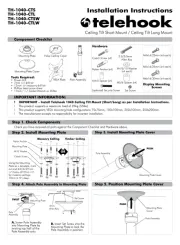
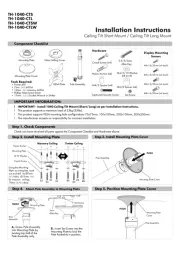
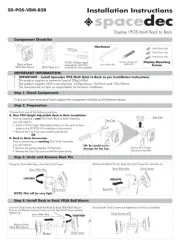
Installation Instructions
Wall Mounted
Sit-to-Stand Workstation
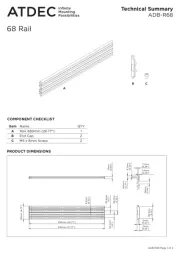
Component Checklist
Step 1. Check Components
A
B
C D E
Lower Arm Upper Arm
Vertical Screen
Slider
Keyboard Tray Tilt Head
A-STSWW
• 8mm wrench
• Drill
• 10mm masonry bit
• 4.5mm drill bit
• Ratchet
• Spirit Level
• Stud Finder
• Pencil
5mm Allen 6mm Allen2.5mm Allen
M6X8 (x1) M4x10 (x4)M6X12 (x4)M8X20 (x1)
8mm
¼” Drive
Velcro
Strip (x2)
H J K L M N
PO Q R S T
Tools Required
Plastic
Washer (x1)
Coach
Screw (x6)
Nylon
Anchor (x6)
Metal
Washer (x1)
M6X10 (x3)
Hardware
F
G
Wall Mounting Hardware
Check that you have received all parts against the Component Checklist.
! IMPORTANT - Install as per Installation Instructions
! The manufacturer accepts no responsibility for incorrect installation.
! This product supports a maximum load 8Kg (17.6lbs.)
! The wall mount can be installed on vertical, flat, solid concrete or brick walls, or timber stud walls only.
! The wall should be strong enough to sustain a weight of at least four times that of the display and wall mount bracket combined.
If in doubt, consult a structural engineer.
! Check wall anchors and screws every 3 months from the time of installation to ensure the workstation is firmly fixed to the wall.
! Tighten all screws (do not exert excessive force to avoid breaking the screws or damaging their thread)
IMPORTANT INFORMATION
Produkspesifikasjoner
| Merke: | Atdec |
| Kategori: | Ikke kategorisert |
| Modell: | A-STSWW |
| Vekt: | 11410 g |
| Bredde: | 1000.76 mm |
| Høyde: | 307.34 mm |
| Lengde: | 1445.26 mm |
| Maksimal skjermstørrelse: | - " |
| Minimum skjermstørrelse: | - " |
| Armlengde: | 2694.94 mm |
| Høydejustering: | Ja |
| Produktfarge: | Sølv |
| Vippevinkelområde: | 35 - 5 ° |
| Monteringssett: | Ja |
| Kroppsmateriale: | Aluminium, Composite, Plastic, Steel |
| Panoreringsomfang: | 90 - 90 ° |
| Montasjetype: | Vegg |
| Maksimalvekt (kapasitet): | 7.9 kg |
| Forbedret kabelføring: | Ja |
| Monteringsgrensesnitt, kompatibilitet (min): | 75 x 75 mm |
| Monteringsgrensesnitt, kompatibilitet (maks): | 100 x 100 mm |
| Distanse til vegg (min.): | 321.8 mm |
Trenger du hjelp?
Hvis du trenger hjelp med Atdec A-STSWW still et spørsmål nedenfor, og andre brukere vil svare deg
Ikke kategorisert Atdec Manualer
12 Oktober 2025

11 Oktober 2025
11 Oktober 2025
10 Oktober 2025
10 Oktober 2025
10 Oktober 2025
10 Oktober 2025
10 Oktober 2025

10 Oktober 2025
10 Oktober 2025
Ikke kategorisert Manualer
- Hawke
- AXESS
- GRAUGEAR
- Digital Watchdog
- Reloop
- Spear & Jackson
- Exquisit
- Gem Toys
- Abus
- Nevadent
- Kluge
- Chrome-Q
- AkYtec
- Triplett
- CAME-TV
Nyeste Ikke kategorisert Manualer

23 Oktober 2025

23 Oktober 2025

23 Oktober 2025

23 Oktober 2025

23 Oktober 2025

23 Oktober 2025

23 Oktober 2025

23 Oktober 2025

23 Oktober 2025

23 Oktober 2025