Atdec ProAV TH-VWV Bruksanvisning
Atdec
Ikke kategorisert
ProAV TH-VWV
Les nedenfor 📖 manual på norsk for Atdec ProAV TH-VWV (5 sider) i kategorien Ikke kategorisert. Denne guiden var nyttig for 5 personer og ble vurdert med 4.5 stjerner i gjennomsnitt av 3 brukere
Side 1/5
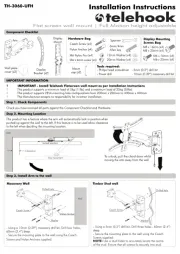
TH-VWV
TH-VWVP
TH-VWP-050
TH-VWP-080
TH-VWP-100
TH-VWP-160
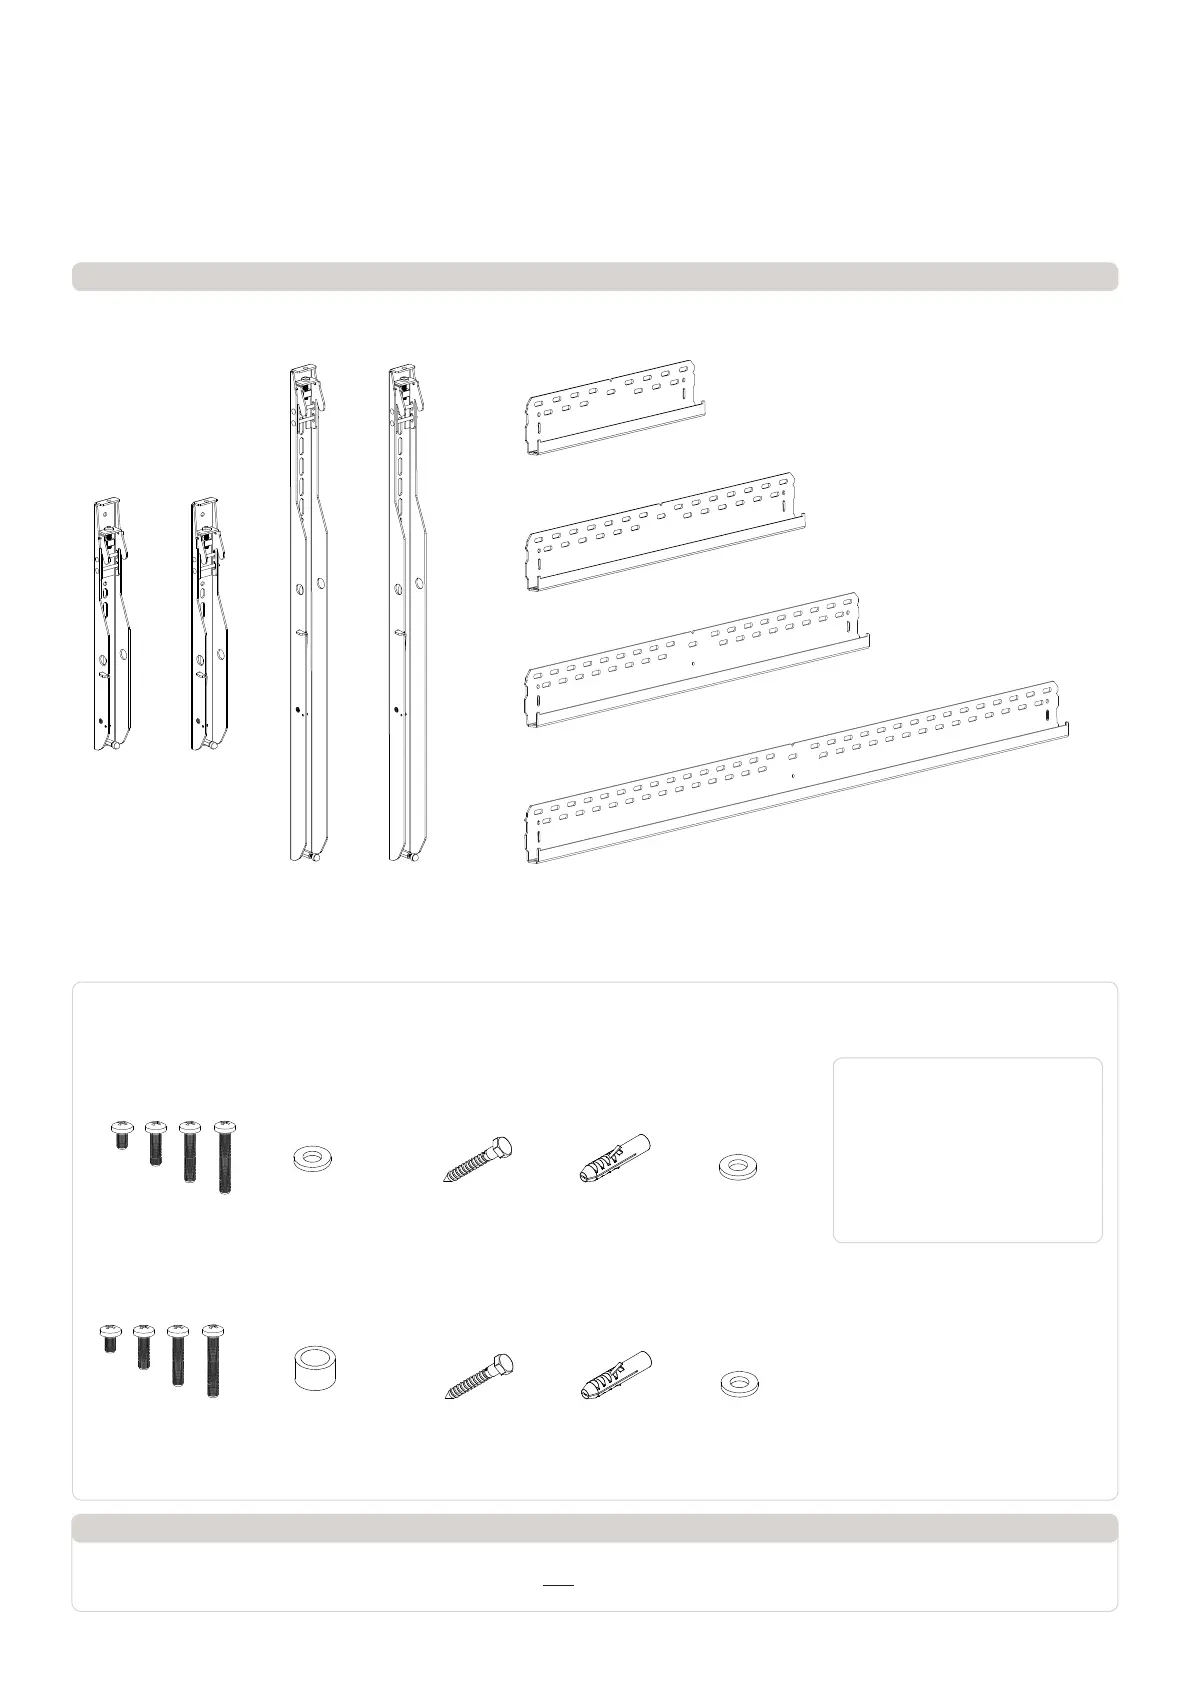
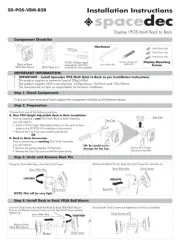
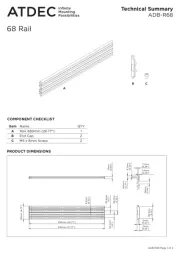
Component Checklist
Universal Video Wall
! IMPORTANT - Install Video Wall as per installation instruction.
! This product supports a maximum load of 165kg (363lbs.) per panel or screen.
! The manufacturer accepts no responsibility for incorrect installation.
IMPORTANT INFORMATION:
Mounting Bracket (x2)
TH-VWVP
Mounting Bracket (x2)
TH-VWV
Wall Plate (1.6m)
TH-VWP-160
Wall Plate (0.8m)
TH-VWP-080
Wall Plate (0.5m)
TH-VWP-050
Wall Plate (1m)
TH-VWP-100
HARDWARE
Mounting Brackets
(TH-VWV, TH-VWVP)
Wall Plate 0.5m, 0.8m, 1m
(TH-VWP-050, TH-VWP-080, TH-VWP-100)
Wall Plate 1.6m
(TH-VWP-160)
Coach Screw
(x2)
Coach Screw
(x3)
M6 x 16/30/45/60
(x4)
M8 x 16/30/50/65
(x4)
Nylon
Anchor (x2)
Nylon
Anchor (x3)
8mm Washer (x2)
8mm Washer (x3)
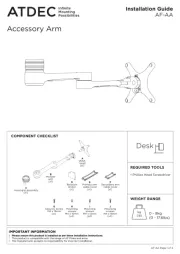
Tools Required:
• Power Drill
• 8mm (0.31”) Drill Bit
• 10mm (0.39”) Masonry Drill Bit
• 13mm (0.51”) Socket Wrench
Shifter
• Phillips Head Screwdriver
• Spirit Level
• Tape Measure
M6 Washer (x4)
Spacer (x8)
Installation Instructions
Produkspesifikasjoner
| Merke: | Atdec |
| Kategori: | Ikke kategorisert |
| Modell: | ProAV TH-VWV |
| Vekt: | 3200 g |
| Bredde: | 130 mm |
| Dybde: | 490 mm |
| Høyde: | 70 mm |
| Pakkevekt: | 13400 g |
| Materiale: | Stål |
| Produktfarge: | Sort |
| Pakkedybde: | 520 mm |
| Pakkehøyde: | 160 mm |
| Pakkebredde: | 270 mm |
Trenger du hjelp?
Hvis du trenger hjelp med Atdec ProAV TH-VWV still et spørsmål nedenfor, og andre brukere vil svare deg
Ikke kategorisert Atdec Manualer
12 Oktober 2025

11 Oktober 2025
11 Oktober 2025
10 Oktober 2025
10 Oktober 2025
10 Oktober 2025
10 Oktober 2025
10 Oktober 2025

10 Oktober 2025
10 Oktober 2025
Ikke kategorisert Manualer
- Hansgrohe
- EGO
- DQ
- Ingenuity
- McIntosh
- Triton
- Auralex
- Cosi Home
- Auna
- Nostalgia
- Magellan
- I-PRO
- Sonorous
- Creality3D
- BenQ
Nyeste Ikke kategorisert Manualer

23 Oktober 2025

23 Oktober 2025

23 Oktober 2025

23 Oktober 2025

23 Oktober 2025

23 Oktober 2025

23 Oktober 2025

23 Oktober 2025

23 Oktober 2025

23 Oktober 2025