Ermenrich Ping MK50 Bruksanvisning

Les nedenfor 📖 manual på norsk for Ermenrich Ping MK50 (35 sider) i kategorien måleinstrument. Denne guiden var nyttig for 2 personer og ble vurdert med 4.5 stjerner i gjennomsnitt av 2 brukere

Side 1/35
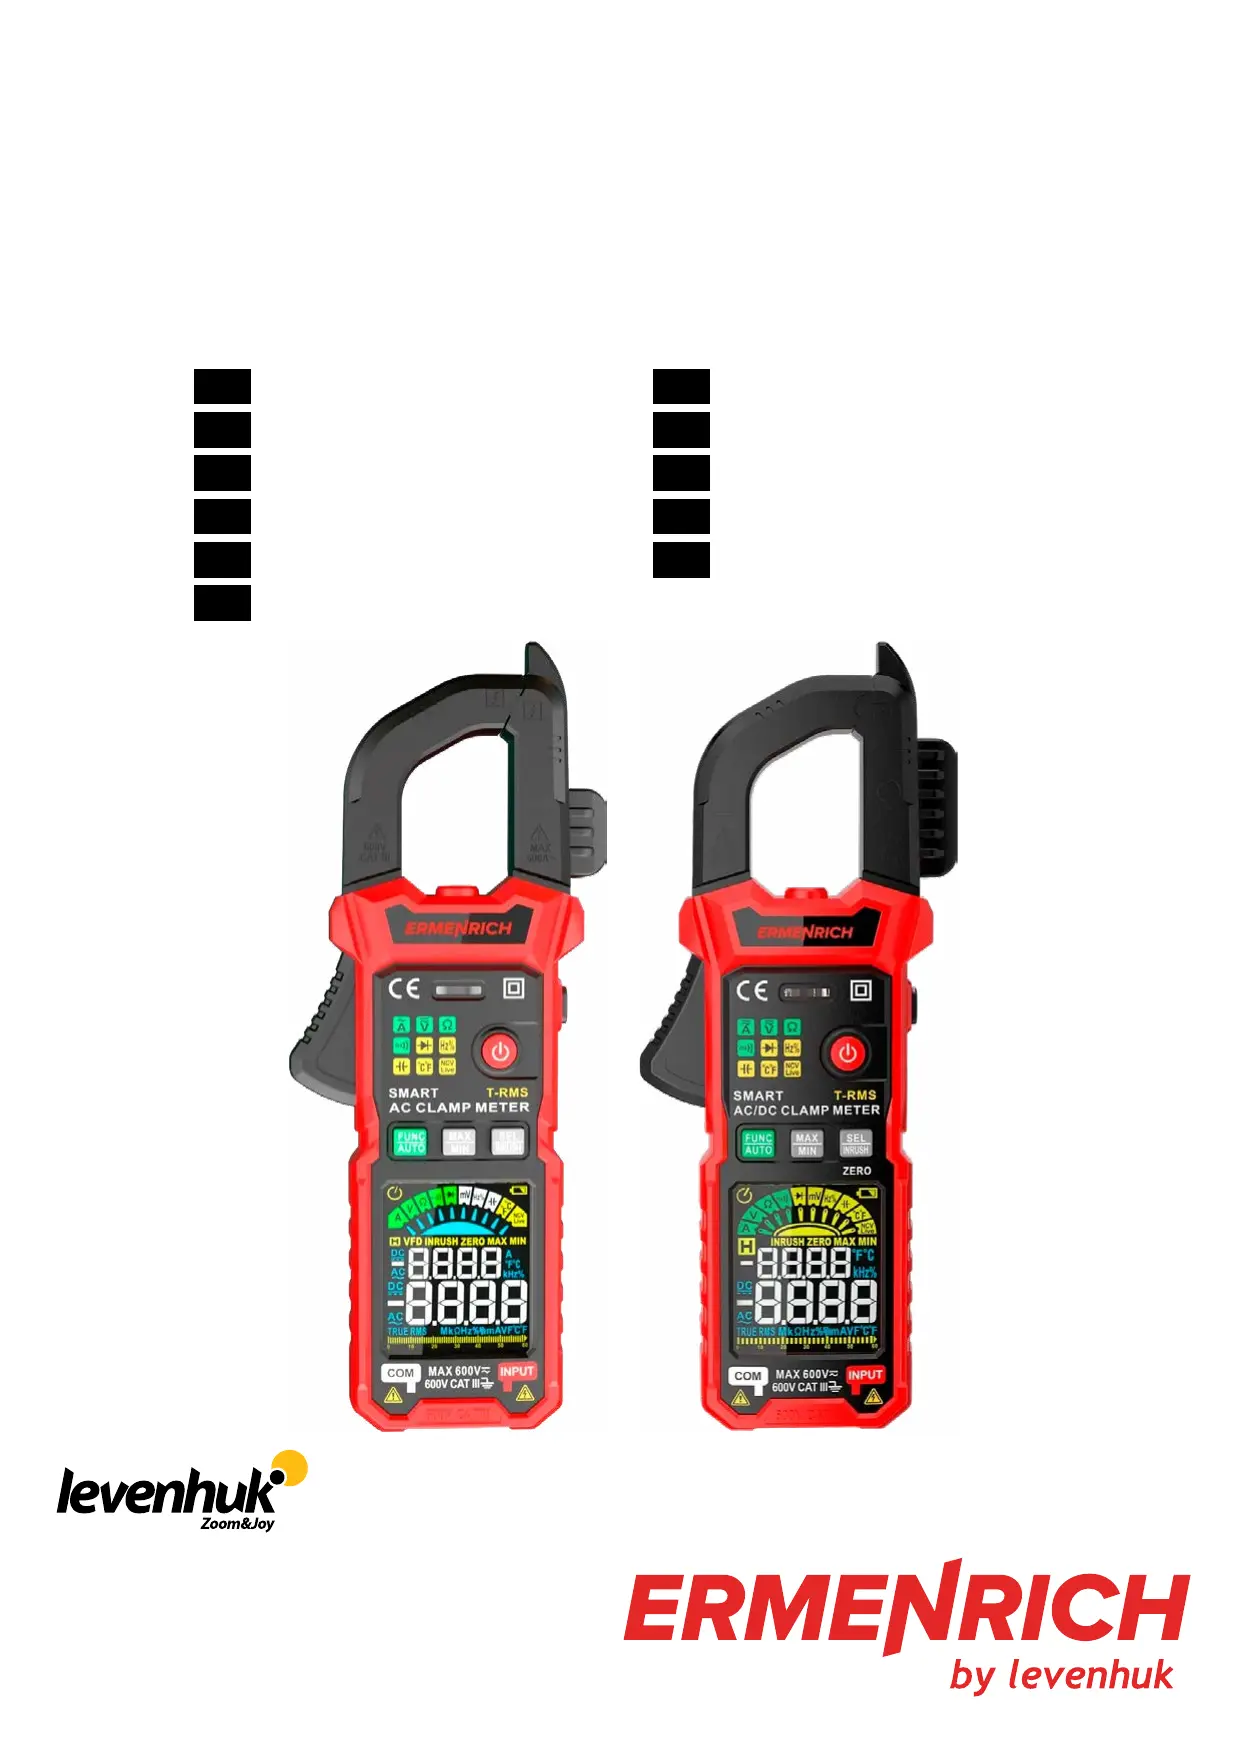
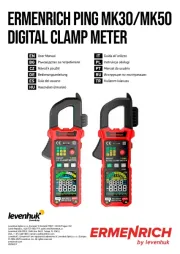
Ermenrich PING MK30/MK50
Digital Clamp Meter
EN
User Manual
BG
Ръководство за потребителя
CZ
Návod k použití
DE
Bedienungsanleitung
ES
Guía del usuario
HU
Használati útmutató
IT
Guida all’utilizzo
PL
Instrukcja obsługi
PT
Manual do usuário
RU
Инструкция по эксплуатации
TR
Kullanım kılavuzu
Levenhuk Optics s.r.o. (Europe): V Chotejně 700/7, 102 00 Prague 102,
Czech Republic, +420 737-004-919, sales-info@levenhuk.cz
Levenhuk USA 928 E 124th Ave. Ste D, Tampa, FL 33612,
USA, +1 813 468-3001, contact_us@levenhuk.com
Levenhuk®, Ermenrich® are registered trademarks of Levenhuk Optics s.r.o. (Europe).
© 2006–2025 Levenhuk, Inc. All rights reserved.
ermenrich.com
20250319
EN BG CZ DE ES
1 NCV probe Проводник NCV Sonda NCV NCV-Prüfspitze Sonda NCV
2 Clamp Скоба Svorka Klemme Abrazadera
3 Flashlight Фенерче Záblesk Taschenlampe Linterna
4 LED indicator Светодиоден индикатор LED indikátor LED-Anzeige Indicador LED
5 Trigger Спусък Spoušt Auslöser Gatillo
6 Power button Захранващ бутон Tlačítko napájení Ein/Aus-Taste Botón de encendido/apagado
7
FUNC/AUTO
(Function/Auto) button
Бутон FUNC/AUTO (Функция/
Автоматичен режим)
Tlačítko FUNC/AUTO (Funkce/
Automatické)
FUNC/AUTO-Taste
(Funktion/Automatik)
Botón FUNC/AUTO (Función/
Auto)
8
MAX/MIN (Max./min.
values) button
Бутон MAX/MIN (Макс./мин.
стойности)
Tlačítko MAX/MIN (Max./min.
hodnoty)
MAX/MIN-Taste (Max./
min. Werte)
Botón MAX/MIN (Valores máx./
mín.)
9
SEL/INRUSH (Select/
Inrush) button
Бутон SEL/INRUSH (Избор/
Пусков ток)
Tlačítko SEL/INRUSH (Výběr/
Rozběhový proud)
SEL/INRUSH-Taste
(Auswahl/Einschaltstrom)
Botón SEL/INRUSH (Seleccionar/
Corriente de irrupción)
10 LCD display Течнокристален дисплей LCD displej LCD-Display Pantalla LCD
11 COM jack (−) Жак COM (−) Konektor COM (−) COM-Buchse (−) Conector COM (−)
12 INPUT jack (+) Жак INPUT (+) Konektor INPUT (+) INPUT-Buchse (+) Conector INPUT (+)
13
H/
button (Data
hold/Flashlight)
Бутон H/ (Задържане
на данните/Фенерче)
Tlačítko H/ (Přidržení
zobrazení naměřené hodnoty/
Záblesk)
H/ -Taste (Daten
behalten/Taschenlampe)
Botón H/ (Retención
de datos/Linterna)
14 Battery compartment Отделение за батериите Přihrádka pro baterii Batteriefach Compartimento de las pilas
HU IT PL PT RU TR
1 NCV-szondát Sonda NCV Sonda NCV Sonda de NCV
Бесконтактный датчик
напряжения (NCV)
NCV sondası
2 Bilincs Morsetto Zacisk Pinça Клещи Kelepçe
3 Zseblámpa Torcia Latarka Lanterna Фонарик Fener
4 LED-visszajelző Indicatore LED Wskaźnik LED Indicador LED Светодиодный индикатор LED gösterge
5 Kioldógombot Innesco Spust Acionador Рычаг Tetik
6
Főkapcsoló gomb
Pulsante di alimentazione
Przycisk zasilania
Botão de ligar/desligar
Кнопка питания Güç düğmesi
7
FUNC/AUTO (Funkció/
Automatika) gomb
Pulsante FUNC/AUTO
(Funzione/Automatico)
Przycisk FUNC/AUTO
(Funkcja/Automatyczny)
Botão FUNC/AUTO
(Função/Auto)
Кнопка FUNC/AUTO
(Функция/Авто)
FUNC/AUTO (İşlev/
Otomatik) düğmesi
8
MAX/MIN (Max./min.
értékek) gomb
Pulsante MAX/MIN
(Valori max./min.)
Przycisk MAX/MIN
(Wartości maks./min.)
Botão MAX/MIN
(Valores máx./mín.)
Кнопка MAX/MIN (Макс./
мин. значения)
MAX/MIN (Maks./min.
değerler) düğmesi
9
SEL/INRUSH
(Kiválasztás/
Bekapcsolási) gomb
Pulsante SEL/INRUSH
(Selezione/Corrente di
spunto)
Przycisk SEL/INRUSH
(Wybierz/Prąd
rozruchowy)
Botão SEL/INRUSH
(Selecionar/Corrente
de irrupção)
Кнопка SEL/INRUSH
(Выбор/Пусковой ток)
SEL/INRUSH (Seç/
Ani boşalma akımı)
düğmesi
10 LCD-kijelző Schermo LDC Wyświetlacz LCD Visor LCD ЖК-дисплей LCD ekran
11 COM aljzat (−) Jack COM (−) Gniazdo COM (−) Tomada COM (−) Разъем COM (−) COM jak (−)
12 INPUT aljzat (+) Jack INPUT (+) Gniazdo INPUT (+) Tomada INPUT (+) Разъем INPUT (+) INPUT jak (+)
13
H/ gomb
(Adattartás/
Zseblámpa)
Pulsante H/
(Conservazione dei dati/
Torcia elettrica)
Przycisk H/
(Zatrzymanie wyników
pomiaru/Latarka)
Botão H/ (Guardar
dados/Lanterna)
Кнопка H/ держание
данных/Фонарик)
H/ (Veri tutma/
Fener) düğmesi
14 Elemtartó rekesz Scomparto batterie Komora baterii
Compartimento das
pilhas
Батарейный отсек Pil bölmesi
7
4
3
1
2
5
8
6
9
13
14
12
11
10
3
EN
Ermenrich Ping MK30/MK50 Digital Clamp Meter
The kit includes: digital clamp meter, test leads, K-type thermocouple, carry bag, user manual, and warranty.
Getting started
Open the battery compartment cover (14) and insert 3 AAA batteries according to the correct polarity. Close the cover.
Usage
Press the power button (6) and hold it for 3 seconds to turn the device on/o. The calibration will be carried out automatically. When turned
on, it displays Auto (Automatic mode) and enters the Smart (Auto) measurement mode. In this mode, AC/DC current, AC/DC voltage,
resistance, and continuity can be measured. Press the FUNC/AUTO button (7) to switch between the functions:
A – AC (MK30) and AC/DC (MK50) measurement;
V – voltage measurement (in V);
– resistance measurement;
– continuity test;
– diode test;
mV – voltage measurement (in mV);
Hz% – frequency and duty cycle measurement;
– capacitance measurement;
°C/°F – temperature measurement;
NCV/LIVE – non-contact voltage and live wire detection.
When the device is o, press and hold (7) for 3 seconds to enable/disable the auto-o option, and then observe the corresponding symbol on
the screen. When the auto-o option is enabled, the device will automatically turn o in 15 minutes.
Press the MAX/MIN button (8) to switch between maximum and minimum values (for current, voltage, and resistance measurements only).
Press and hold (8) for 3 seconds to exit this function.
Press the SEL/INRUSH button (9) to select the function and inrush current measurement as well as to reset the display to zero (for DC
measurement mode only).
Press the H/
button (13) to hold the display readings (H appears on the screen). Press and hold (13) for 3 seconds to turn the ashlight
on/o.
AC/DC measurement
Press (7) to switch to the A mode. Press (9) until AC or DC appears on the screen. Press the trigger (5) to open the clamps (2) and fully
enclose the conductor to be measured. Then slowly release the trigger (5). In order to ensure the measurement accuracy, the measured
conductor must be placed in the center of the clamps. When measuring the DC, press and hold (9) for 3 seconds to set the remaining
magnetization to zero. The device will beep and ZERO will appear on the screen. The measurement results will appear on the LCD display (10).
To measure AC inrush current, press (9) until INRUSH appears on the screen.
The measurement time of inrush current is about 100ms.
For the following measurements using test leads, select the required operation mode. Plug the black test lead into the COM jack (11) and
the red test lead into the INPUT jack (12).
Voltage measurement (in V)
Press (7) to switch to the V mode. Press (9) until AC or DC appears on the screen. Connect the probes to the measuring points.
The measurement results will appear on the LCD display (10).
When measuring the AC voltage, the frequency will be displayed.
Resistance measurement
Press (7) to switch to the mode. Connect the probes to the resistance measuring points of circuit or resistor. The measurement results will
appear on the LCD display (10).
Before measurement, make sure that the power supply is disconnected and the capacitor in the circuit is completely discharged.
Continuity test
Press (7) to switch to the mode. Connect the probes to the circuit or component to be tested. The measurement results will appear on
the LCD display (10).
If the resistance is < 50Ω, an acoustic signal will be emitted continuously and the green LED indicator (4) will light up.
Diode test
Press (7) to switch to the mode. Connect the black test probe to the cathode side and the red test probe to the anode side of the diode
to be measured. The measurement results will appear on the LCD display (10).
If the polarity of the test probes is reverse to the diode polarity, the OL (Overload) will appear on the screen. This can be used for
distinguishing the anode and cathode side of a diode.
Please carefully read the safety instructions and the user manual before using this product, otherwise it may result in hazardous laser
radiation and electric shock. Use the device only as specied in the user manual. Keep away from children.

Produkspesifikasjoner

Merke: Ermenrich
Kategori: måleinstrument
Modell: Ping MK50

Trenger du hjelp?

Hvis du trenger hjelp med Ermenrich Ping MK50 still et spørsmål nedenfor, og andre brukere vil svare deg