Extron V-Lock Bruksanvisning
Extron
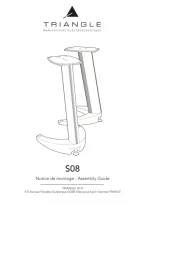
høyttalerstøtte
V-Lock
Les nedenfor 📖 manual på norsk for Extron V-Lock (8 sider) i kategorien høyttalerstøtte. Denne guiden var nyttig for 26 personer og ble vurdert med 4.8 stjerner i gjennomsnitt av 13.5 brukere
Side 1/8

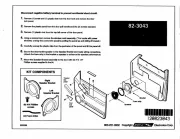
User’s Guide
Replacement accessory for Extron System INTEGRATOR
®
SI 3 Surface Mount Speakers
68-1490-01
Rev. A
03 08
V-Lock
™
Wall Mount Assembly Kit
Produkspesifikasjoner
| Merke: | Extron |
| Kategori: | høyttalerstøtte |
| Modell: | V-Lock |
Trenger du hjelp?
Hvis du trenger hjelp med Extron V-Lock still et spørsmål nedenfor, og andre brukere vil svare deg
høyttalerstøtte Extron Manualer

15 Oktober 2024

15 Oktober 2024
høyttalerstøtte Manualer
- Toa
- Yamaha
- Vivolink
- Neumann
- Velleman
- NeoMounts
- Teufel
- Bogen
- LD Systems
- Monacor
- Bang Olufsen
- Nubert
- Rocketfish
- Harman Kardon
- Cambridge
Nyeste høyttalerstøtte Manualer
16 Oktober 2025
12 Oktober 2025
12 Oktober 2025
12 Oktober 2025
10 Oktober 2025
9 Oktober 2025
9 Oktober 2025

9 Oktober 2025
9 Oktober 2025
9 Oktober 2025