Festo EHAM-E20-40-Z Bruksanvisning
Festo
Ikke kategorisert
EHAM-E20-40-Z
Les nedenfor 📖 manual på norsk for Festo EHAM-E20-40-Z (2 sider) i kategorien Ikke kategorisert. Denne guiden var nyttig for 18 personer og ble vurdert med 4.7 stjerner i gjennomsnitt av 9.5 brukere
Side 1/2
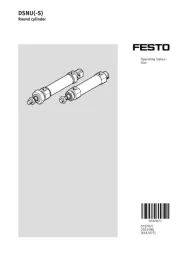
Translation of the original instructions
1 Further applicable documents
All available documents for the product www.festo.com/pk.è
Observe further applicable documents:
– Instruction manual for adapter kit EHAM-E20-40-E...
– Instruction manual for rotary gripper module EHMD-40
2 Safety
2.1 Safety instructions
– Before starting mounting work: Switch off power supply.
– Secure screw fittings using an adhesive locking agent.
– Observe tightening torques.
Tightening torques 5 Screw sizes and tightening torques.è
2.2 Intended use
Mounting the rotary gripper module EHMD-40 on one of the following Z axes : ‑7
Adapter kit Z-axis6 7
EHAM-E20-40-E9 EGSK-20
EGSK-26
EHAM-E20-40-E8 EGSL-BS-35
EGSL-BS-45
EHAM-E20-40-E19 EGSC-BS-…-25
EGSC-BS-…-32
Tab. 1 Intended use
3 Product overview
3.1 Product range overview
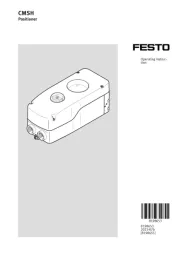
3.1.1 Included in delivery
1
Socket head screw (4x)
2
Base plate (1x) with slide and
compression spring
3
Centring pin (2x)
4
Rail (1x)
5
Socket head screw (3x)
Fig. 1
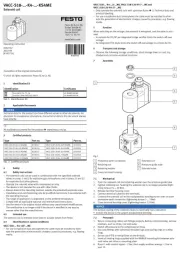
3.1.2 Not included in the delivery
6
Adapter kit
7
Z-axis
8
Rotary gripper module EHMD-40
9
Adhesive for medium-strength
screw locking
Fig. 2
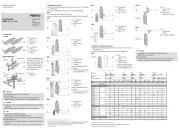
3.2 Function
The mounting is positioned between the rotary gripper module and the8
adapter kit . The rotary gripper module is mounted by means of a dovetail6 8
clamp. This enables additional adjustment of the rotary gripper module in the8
Zdirection.
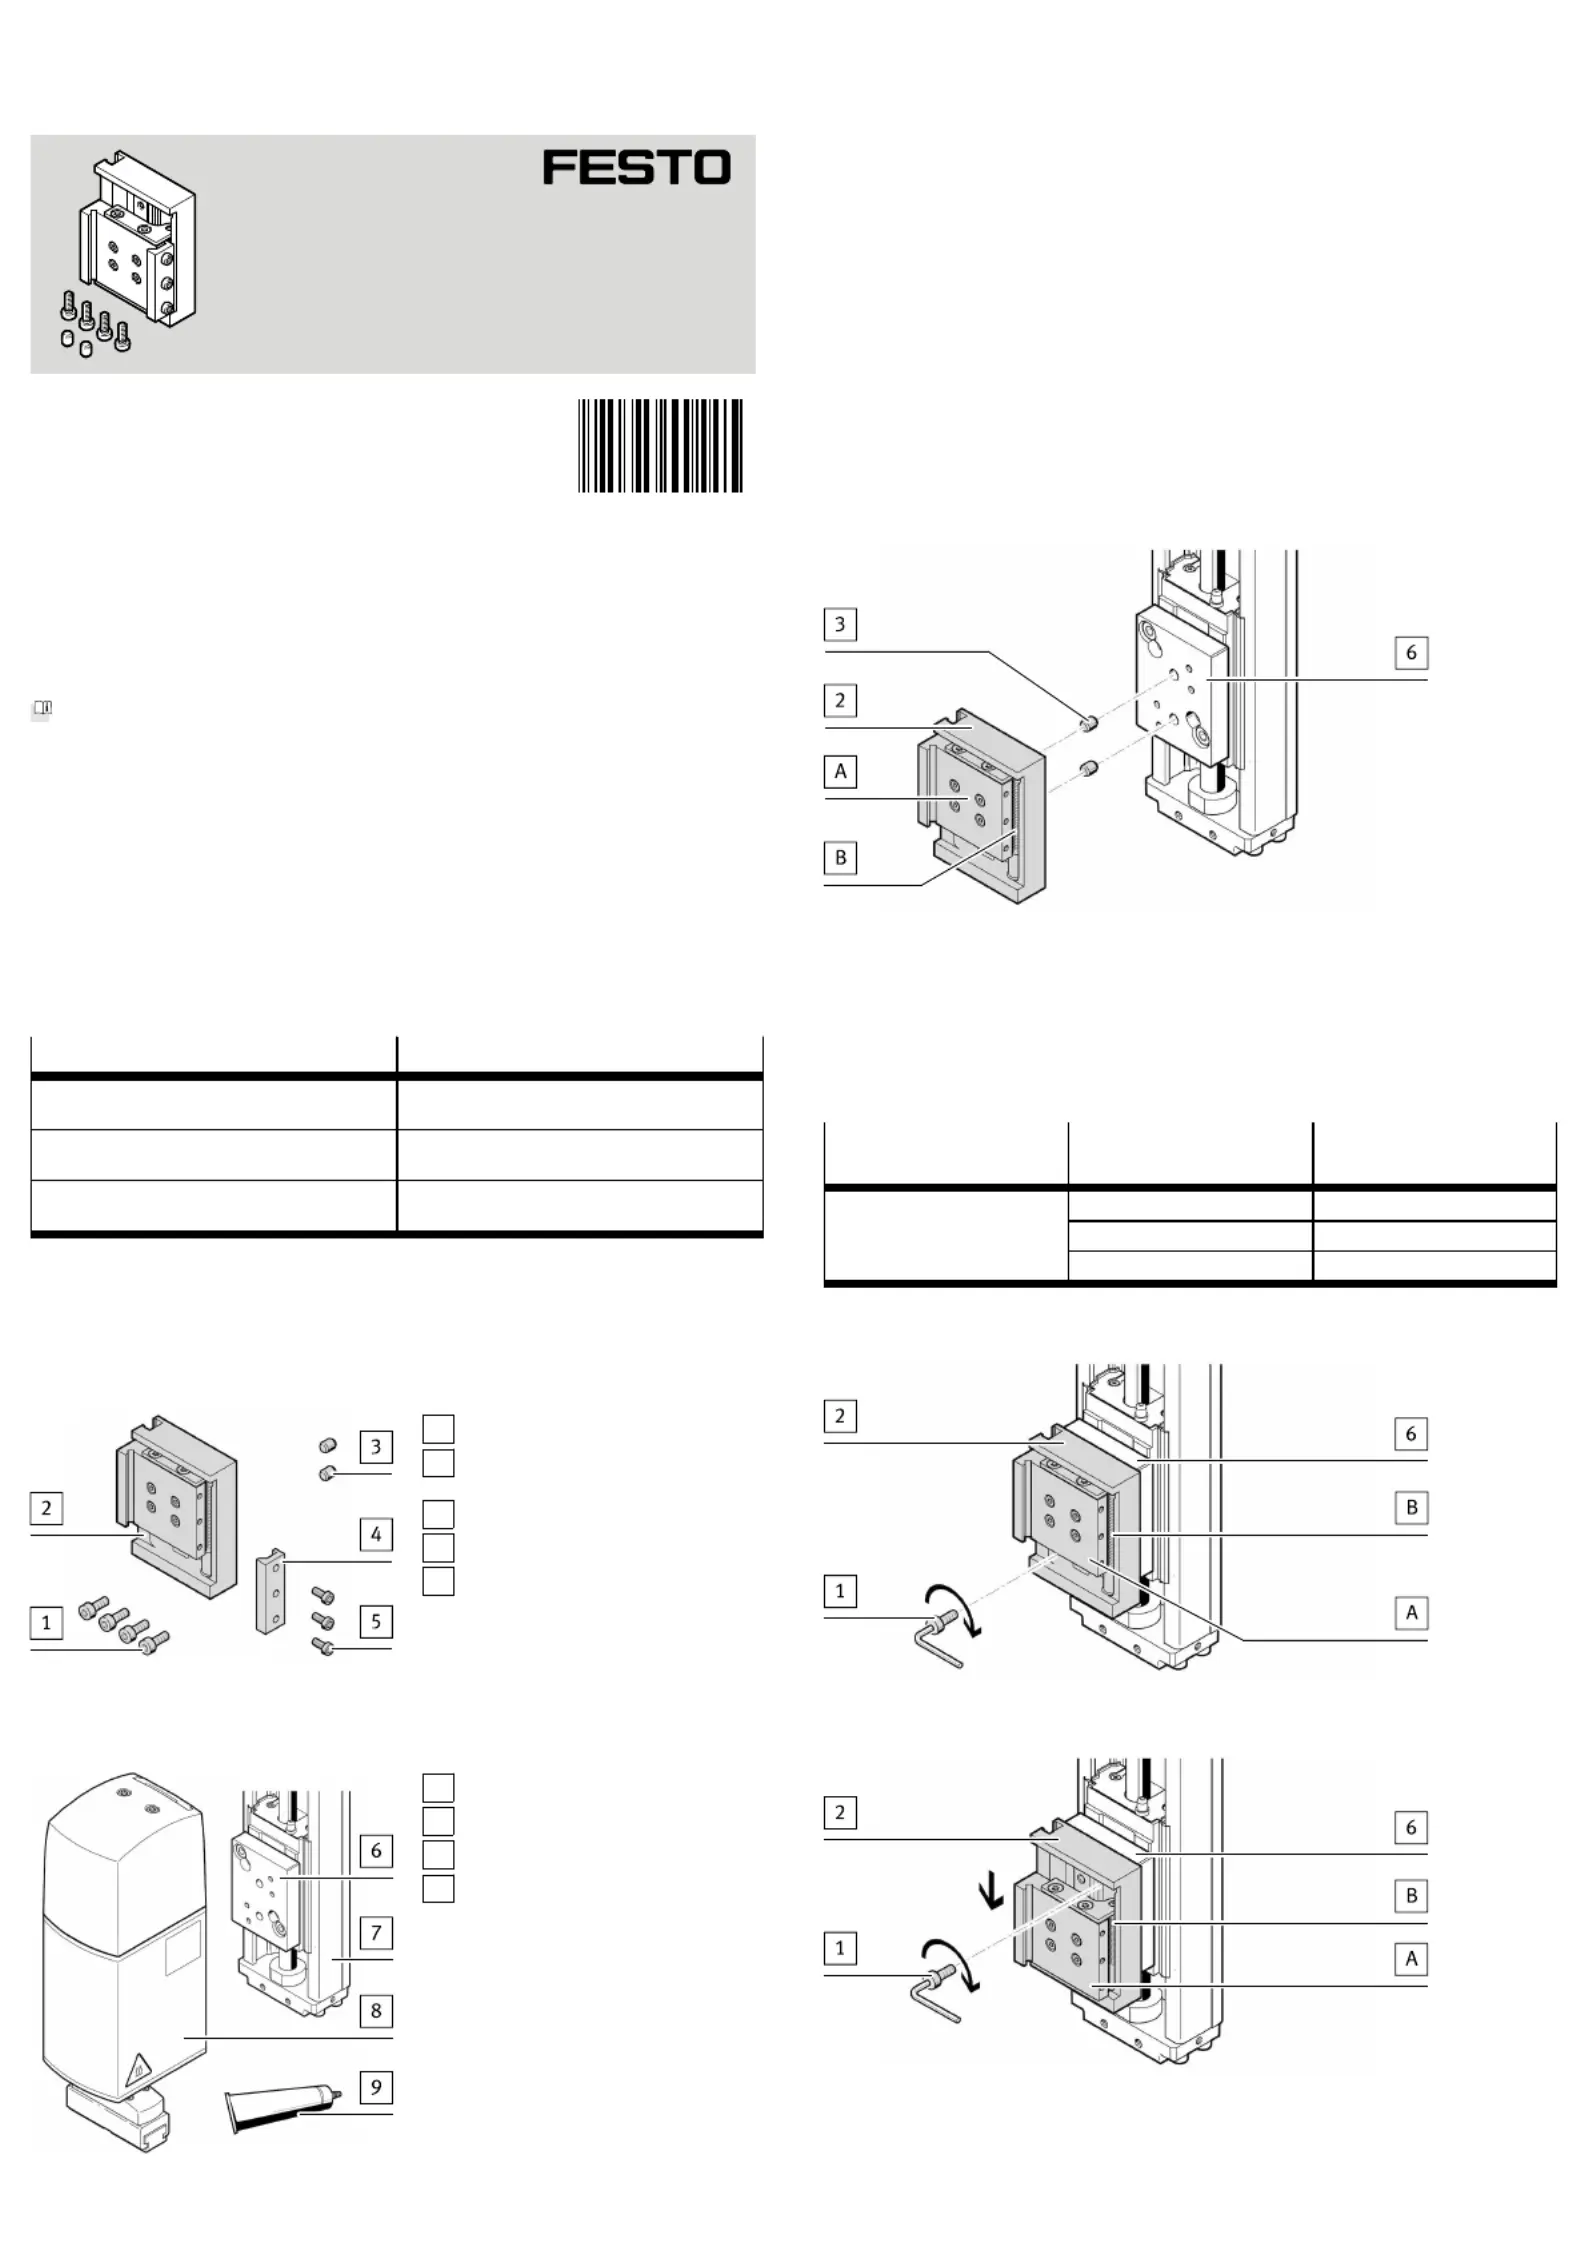
Without the rotary gripper module in place, the slide(A) is pressed into the upper
end position by a preloaded compression spring(B). With the rotary gripper mod-
ule in place, the slide(A) occupies the lower end position. The slide(A) thus per-
mits a Z compensation stroke of max. 12mm. This makes it possible to com-
pensate relatively small movements (e.g. the thread pitch of a cover) without
needing to move the Z axis.‑
4 Mounting
4.1 Preparation
• Mount the appropriate adapter kit on the Z axis6‑7
è 1 Further applicable documents.
4.2 Installation
Positioning the mounting on the adapter kit
Fig. 3
1. Align the base plate in such a way that the slide(A) is located in the upper2
end position.
2. Position the base plate on the adapter kit with the centring pins .2 6 3
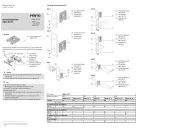
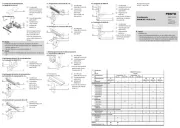
Mounting the base plate on the adapter kit
The number of socket head screws required to mount the base plate varies1 2
depending on the adapter kit :6
Mounting Adapter kit Number of socket head6
screws1
EHAM-E20-40-E8 4
EHAM-E20-40-E9 2
EHAM-E20-40-Z
EHAM-E20-40-E19 2
Tab. 2 Number of socket head screws
Fig. 4
Fig. 5
1. The slide(A) is in its natural upper end position.
Ä
Holes for the socket head screws are accessible in the lower region of1
the base plate .2
8080697
Mounting
EHAM-E20-40-Z
8080697
2017-12
[8080699]
Instructions|Assembly
Festo SE & Co. KG
Ruiter Straße 82
73734 Esslingen
Germany
+49 711 347-0
www.festo.com
Produkspesifikasjoner
| Merke: | Festo |
| Kategori: | Ikke kategorisert |
| Modell: | EHAM-E20-40-Z |
Trenger du hjelp?
Hvis du trenger hjelp med Festo EHAM-E20-40-Z still et spørsmål nedenfor, og andre brukere vil svare deg
Ikke kategorisert Festo Manualer
6 August 2025
6 August 2025
6 August 2025
6 August 2025
6 August 2025
6 August 2025

6 August 2025
6 August 2025

31 Mars 2025

31 Mars 2025
Ikke kategorisert Manualer
- Flex
- Trixie
- Toorx
- JLCooper
- Artrom
- Infinity
- Lupine
- Mega
- OBSBOT
- Mafell
- GVision
- Black Box
- Ikon
- Antelope Audio
- MBM
Nyeste Ikke kategorisert Manualer

23 Oktober 2025

23 Oktober 2025

23 Oktober 2025

23 Oktober 2025

23 Oktober 2025

23 Oktober 2025

23 Oktober 2025

23 Oktober 2025

23 Oktober 2025

23 Oktober 2025