FireAngel FP1000W2-R Bruksanvisning
Les nedenfor 📖 manual på norsk for FireAngel FP1000W2-R (8 sider) i kategorien smarthjem. Denne guiden var nyttig for 9 personer og ble vurdert med 4.6 stjerner i gjennomsnitt av 5 brukere
Side 1/8

-
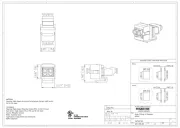
Installation Guide
WIRELESS INTERLINK
GATEWAY
Drawing No: GN5520
Revision: 1
Drawn By: D4
Tschaka R-M May 2019
FireAngel Safety Technology Limited. Artwork Information
Ensure that you are printing / manufacturing from the original artwork file and not a preview
CONFIDENTIAL: The information provided in this document is proprietary to Sprue Aegis Plc/FireAngel Safety
Technology Limited and as such should only be used/shared for the exclusive manufacture of those products
specified.
Title/Description:
User Manual
Material:
Refer to MS0032
Used On / Used For:
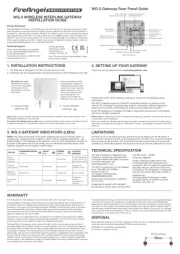
FP1000W2-R (WG-2R)
Size:
W - 88mm / H - 88mm
Supplier:
FLEX
Print Colours:
CMYK
DE = 0800 3330 5103 / technik@sprue.com
NL = 0800 311 1111 / klantenservice@sprue.com
FR = 0800 940 078 / supporttechnique@sprue.com
WG-2
Produkspesifikasjoner
| Merke: | FireAngel |
| Kategori: | smarthjem |
| Modell: | FP1000W2-R |
Trenger du hjelp?
Hvis du trenger hjelp med FireAngel FP1000W2-R still et spørsmål nedenfor, og andre brukere vil svare deg
smarthjem FireAngel Manualer
3 September 2025
2 September 2025

2 September 2025

2 September 2025
smarthjem Manualer
Nyeste smarthjem Manualer

17 Oktober 2025
12 Oktober 2025

9 Oktober 2025
4 Oktober 2025
2 Oktober 2025
1 Oktober 2025
1 Oktober 2025

30 September 2025
29 September 2025
28 September 2025