Fusion EN-AB1120 Bruksanvisning
Fusion
Bilhøyttaler
EN-AB1120
Les nedenfor 📖 manual på norsk for Fusion EN-AB1120 (2 sider) i kategorien Bilhøyttaler. Denne guiden var nyttig for 14 personer og ble vurdert med 4.8 stjerner i gjennomsnitt av 7.5 brukere
Side 1/2
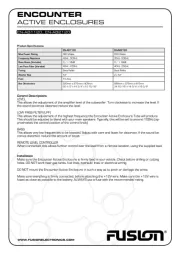
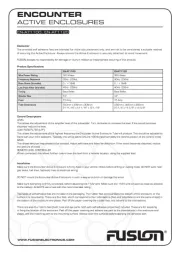
ENCOUNTER
ACTIVE ENCLOSURES
EN-AB1120, EN-AB2120
Product Specifications
Control Descriptions
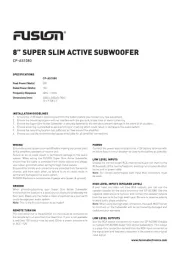
LEVEL
This allows the adjustment of the amplifier level of the subwoofer. Turn clockwise to increase the level. If
the sound becomes distorted reduce the level.
LOW PASS FILTER (LPF)
This allows the adjustment of the highest frequency the Encounter Active Enclosure Tube will produce.
This should be adjusted to blend with your main speakers. Typically, this will be set to around 100Hz (ap-
proximately the central position of the control knob).
BASS
This allows very low frequencies to be boosted. Adjust with care and listen for distortion. If the sound be-
comes distorted, reduce the amount of boost.
REMOTE LEVEL CONTROLLER
When connected, this allows further control over the level from a remote location, using the supplied lead.
Installation
Make sure the Encounter Active Enclosure is firmly fixed in your vehicle. Check before drilling or cutting
holes. DO NOT work near gas tanks, fuel lines, hydraulic lines or electrical wiring.
DO NOT mount the Encounter Active Enclosure in such a way as to pinch or damage the wires.
Make sure everything is firmly connected, before attaching the +12V wire. Make sure the +12V wire is
fused as close as possible to the battery. ALWAYS use a fuse with the recommended rating.
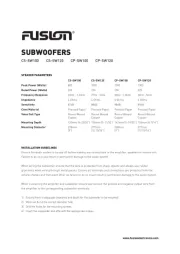
EN-AB1120 EN-AB2120
Max Power Rating 360 Watts 550 Watts
Frequency Repsonse 4OHz - 500Hz 35Hz - 500Hz
Bass Boost (Variable) 0 / + 18dB 0 / + 18dB
Low Pass Filter (Variable)
40Hz - 250Hz 40Hz - 250Hz
Tuning Bass Reflex Bass Reflex
Woofer Size 12” 2 x 12”
Fuse 15 Amp
Box Dimensions 520mm x 375mm x 405mm
20 1/2” x 14 3/4” x 15 15/16”
880mm x 375mm x 415mm
34 10/16” x 14 3/4” x 16 3/8”
Produkspesifikasjoner
| Merke: | Fusion |
| Kategori: | Bilhøyttaler |
| Modell: | EN-AB1120 |
Trenger du hjelp?
Hvis du trenger hjelp med Fusion EN-AB1120 still et spørsmål nedenfor, og andre brukere vil svare deg
Bilhøyttaler Fusion Manualer

4 September 2025
3 September 2025
3 September 2025
2 September 2025
2 September 2025
Bilhøyttaler Manualer
- Hifonics
- DLS
- Memphis Audio
- Crunch
- Biltema
- Infinity
- JL Audio
- Audiotec Fischer
- Ferguson
- Kicker
- JBL
- Hertz
- Blaupunkt
- Mtx Audio
- Boss
Nyeste Bilhøyttaler Manualer
20 Oktober 2025
20 Oktober 2025
20 Oktober 2025
20 Oktober 2025
19 Oktober 2025
19 Oktober 2025
18 Oktober 2025
17 Oktober 2025
17 Oktober 2025
16 Oktober 2025