Lorex AM41TK Bruksanvisning
Les nedenfor 📖 manual på norsk for Lorex AM41TK (2 sider) i kategorien smarthjem. Denne guiden var nyttig for 15 personer og ble vurdert med 4.6 stjerner i gjennomsnitt av 8 brukere
Side 1/2
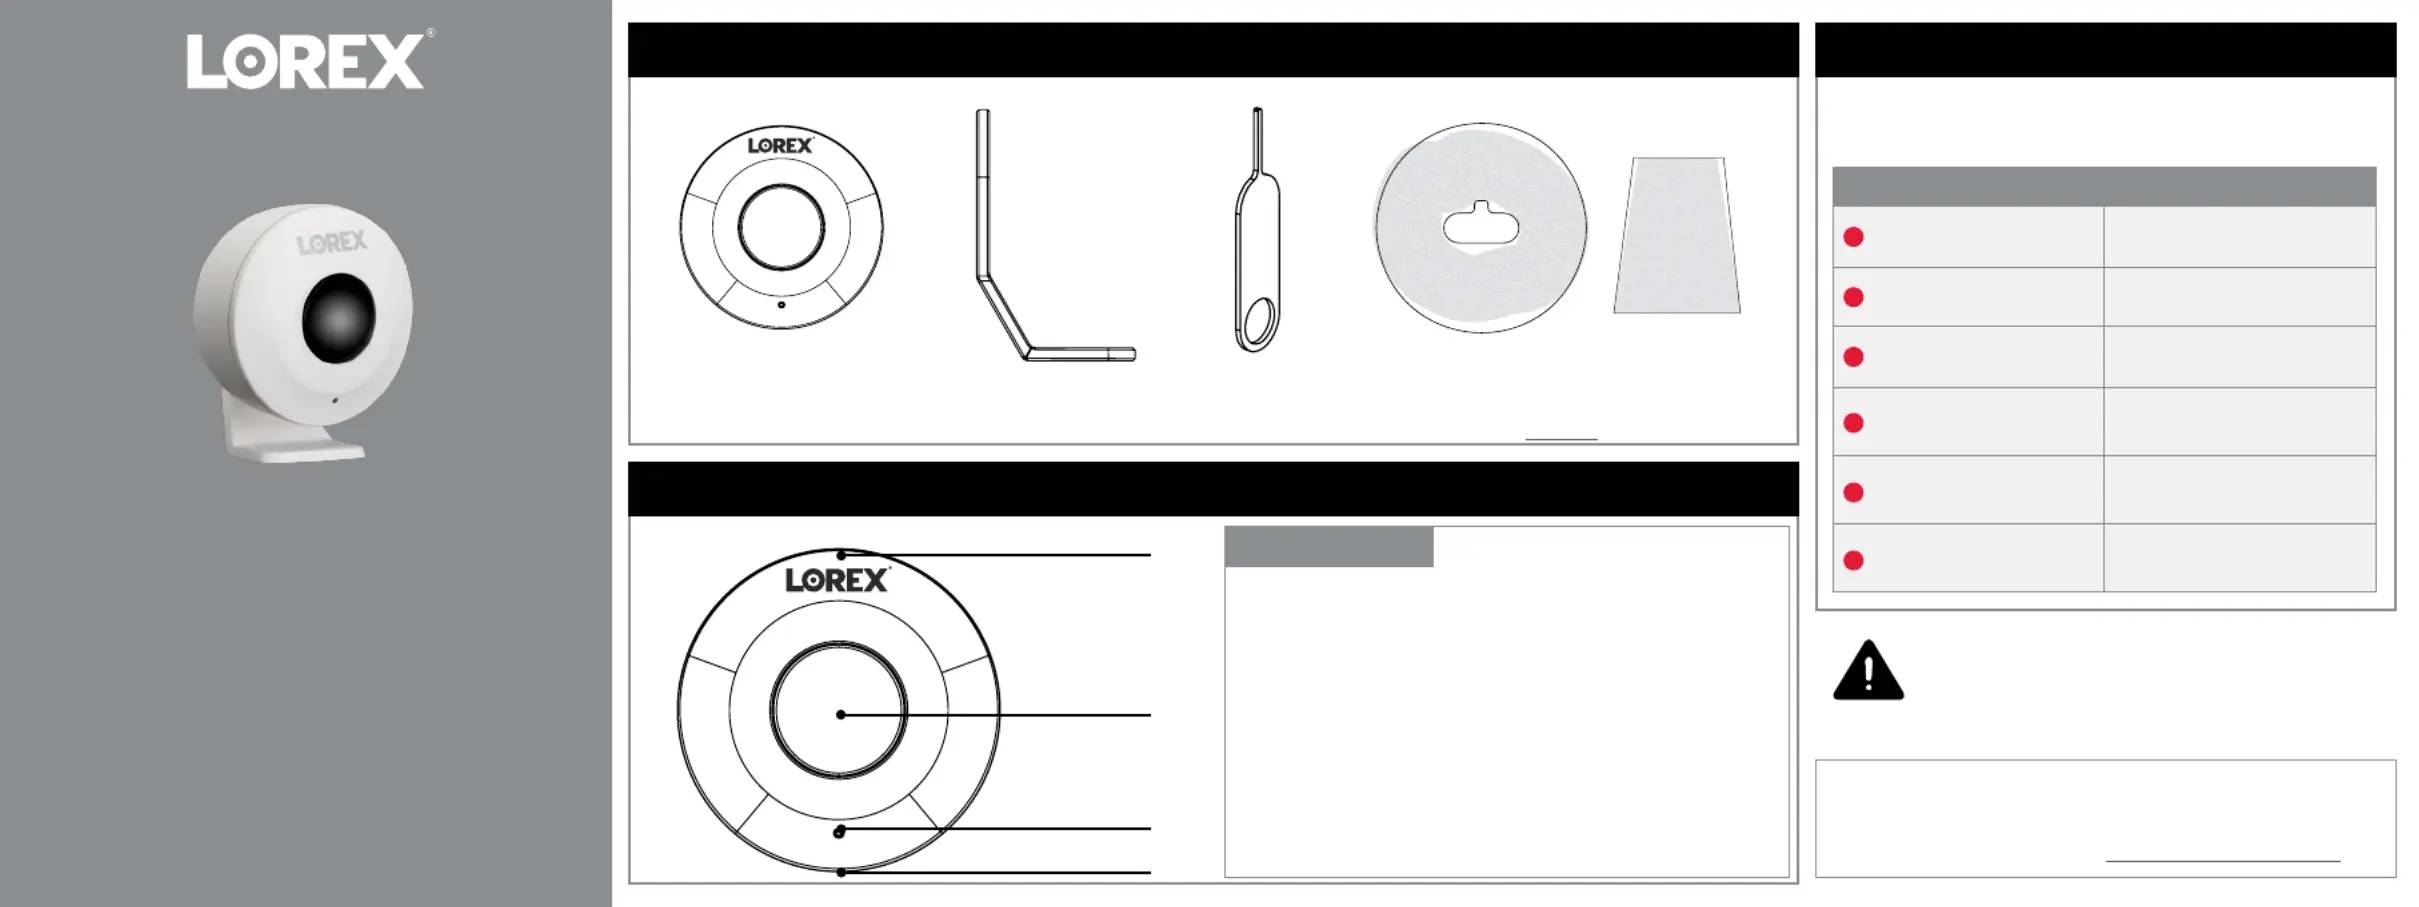
Motion Sensor
AM41TK Series
Quick Start Guide
lorex.com
PIR Sensor
Bracket
(optional)
Mounting Adhesive
Pin*
Package Contents
AM41TK_QSG_EN_R1
LED Behavior
See the table below for denitions of the
sensor’s LED behaviors:
Lorex products come with a standard 1-year
warranty. For more information about Lorex’s
warranty policy, visit .lorex.com/warranty
WAR NING:
CHOKING HAZARD
KEEP OUT OF REACH OF CHILDREN
Behavior Meaning
(solid for 2 seconds)
Powered on.
(ashing rapidly)
Ready to pair.
(solid for 2 seconds)
Pairing successful.
(ashing 3 times)
Pairing failed. Try
repeating the setup.
(ashing rapidly)
Alarm has been
triggered.
(ashing)
Firmware upgrade in
progress.
Battery slot
LED indicator
Pin insert
PIR sensor
Overview
• Environment: Indoor
• Maximum detection distance: 26 feet
• Maximum detection angle: 110°
• Operating temperature: 14°F~113°F
• Operating humidity: 0-95%RH
• Battery: CR2450
• Protocol: Bluetooth 5.0
Specifications
*May include one or more, depending on the package purchased.
To purchase additional sensors, visit and/or authorized resellers.lorex.com
Produkspesifikasjoner
| Merke: | Lorex |
| Kategori: | smarthjem |
| Modell: | AM41TK |
Trenger du hjelp?
Hvis du trenger hjelp med Lorex AM41TK still et spørsmål nedenfor, og andre brukere vil svare deg
smarthjem Lorex Manualer
11 August 2025
smarthjem Manualer
- Cisco
- IKEA
- Ring
- Rademacher
- FireAngel
- Fysic
- Krüger&Matz
- Somfy
- Smartwares
- LevelOne
- Imou
- NGS
- Furman
- Devolo
- Salus
Nyeste smarthjem Manualer
17 Oktober 2025
12 Oktober 2025
9 Oktober 2025
4 Oktober 2025
2 Oktober 2025
1 Oktober 2025
1 Oktober 2025

30 September 2025
29 September 2025
28 September 2025