Tripp Lite SRCOOLTMVENT Bruksanvisning
Tripp Lite
luftkondisjonering
SRCOOLTMVENT
Les nedenfor 📖 manual på norsk for Tripp Lite SRCOOLTMVENT (24 sider) i kategorien luftkondisjonering. Denne guiden var nyttig for 11 personer og ble vurdert med 4.3 stjerner i gjennomsnitt av 6 brukere
Side 1/24

1
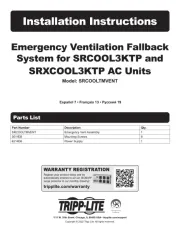
Installation Instructions
Emergency Ventilation Fallback
System for SRCOOL3KTP and
SRXCOOL3KTP AC Units
Model: SRCOOLTMVENT
1111 W. 35th Street, Chicago, IL 60609 USA • tripplite.com/support
Copyright © 2022 Tripp Lite. All rights reserved.
WARRANTY REGISTRATION
Register your product today and be
automatically entered to win an ISOBAR
®
surge protector in our monthly drawing!
tripplite.com/warranty
Español 7 • Français 13 • Русский 19
Parts List
Part Number Description Qty.
SRCOOLTMVENT Emergency Vent Assembly 1
3011EB Mounting Screws 6
6214D6 Power Supply 1
Produkspesifikasjoner
| Merke: | Tripp Lite |
| Kategori: | luftkondisjonering |
| Modell: | SRCOOLTMVENT |
| Vekt: | 7800 g |
| Bredde: | 566.9 mm |
| Dybde: | 301 mm |
| Høyde: | 87.4 mm |
| Strømkilde: | AC |
| Opprinnelsesland: | China |
| Pakkevekt: | 8070 g |
| Inngangsspenning: | 100 - 240 V |
| Utgangsstrøm: | 12 V |
| AC-inngangsfrekvens: | 50 - 60 Hz |
| Produktfarge: | Sort |
| Pakkedybde: | 611.2 mm |
| Pakkehøyde: | 120.6 mm |
| Monteringssett: | Ja |
| Pakkebredde: | 349.2 mm |
| Bærekraftsertifikater: | RoHS |
| Harmonisert system (HS)-kode: | 8415.90.8085 |
| Modell/Type: | Ventilert tomt panel |
| Kroppsmateriale: | Stål |
| Bærekraftsamsvar: | Ja |
| Produkter per masterkasse (ytterkasse): | 1 stykker |
| Innput-strøm: | 1 A |
Trenger du hjelp?
Hvis du trenger hjelp med Tripp Lite SRCOOLTMVENT still et spørsmål nedenfor, og andre brukere vil svare deg
luftkondisjonering Tripp Lite Manualer

18 August 2025
18 August 2025
18 August 2025
18 August 2025
17 August 2025
17 August 2025
17 August 2025
17 August 2025
17 August 2025

16 August 2025
luftkondisjonering Manualer
- Hitachi
- BEKO
- Osram
- GoldAir
- Frilec
- Midea
- G3 Ferrari
- Salicru
- Sencor
- Eurom
- Livoo
- Ufesa
- Be Cool
- Manta
- Klarstein
Nyeste luftkondisjonering Manualer

20 Oktober 2025
19 Oktober 2025
18 Oktober 2025
17 Oktober 2025
13 Oktober 2025
13 Oktober 2025
13 Oktober 2025

13 Oktober 2025

13 Oktober 2025
13 Oktober 2025