Kidde 29D Bruksanvisning
Kidde
Røykvarsler
29D
Les nedenfor 📖 manual på norsk for Kidde 29D (10 sider) i kategorien Røykvarsler. Denne guiden var nyttig for 2 personer og ble vurdert med 4.5 stjerner i gjennomsnitt av 2 brukere
Side 1/10

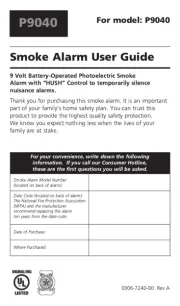
Photoelectric Smoke Alarm
User Guide
0306-7210-05 Rev.A
For 9 Volt Battery Operated Smoke Alarm
Thank you for purchasing this smoke alarm. It is an important part of your
family’s home safety plan. You can trust this product to provide the highest
quality safety protection. We know you expect nothing less when the lives of
your family are at stake.
Please take a few minutes to read this User Guide and save it for future reference.
Teach children how to respond to the alarms, and that they should never play
with the unit.
ATTENTION: Please take a few minutes to thoroughly read this User guide which
should be saved for future reference and passed on to any subsequent owner.
For model 29D,29HD
0786-CPD-20733
08
EN14604:2005
0306-7210-05_NB_CPD:_ 2018.9.20 2:15 PM Page 1

Do not try to repair the smoke alarm yourself. Refer to the instructions in Section 9 for
s
ervice.
WWAARRNNIINNGG!!
UNIT WILL NOT ATTACH TO MOUNTING PLATE UNLESS
B
ATTERY IS PRESENT. REMOVAL OF BATTERY WILL RENDER THE SMOKE
ALARM INOPERATIVE.
IIMMPPOORRTTAANNTT!!
READ ALL INSTRUCTIONS BEFORE INSTALLATION AND KEEP
THIS USER GUIDE NEAR THE ALARM FOR FUTURE REFERENCE.
CONTENTS OF THIS MANUAL
1 -- RECOMMENDED LOCATIONS FOR SMOKE ALARMS
2 -- LOCATIONS TO AVOID
3 -- INSTALLATION INSTRUCTIONS
4 -- OPERATION AND TESTING
5 -- HUSH CONTROL FEATURE
6 -- MAINTENANCE
7 -- LIMITATIONS OF SMOKE ALARMS
8 -- GOOD SAFETY HABITS
9 -- WARRANTY/SERVICE
1. RECOMMENDED LOCATIONS FOR ALARMS
• Locate the first alarm in the immediate area of the sleeping rooms. Try to protect the exit
path as the sleeping rooms are usually farthest from the exit. If more than one sleeping
area exists, locate additional alarms in each sleeping area.
• Locate additional alarms to protect any stairway as stairways act like chimneys for smoke
and heat.
• Locate at least one alarm on every floor level.
• Locate an alarm in every sleeping room.
• Locate an alarm in every room where electrical appliances are operated (i.e. portable
heaters or humidifiers).
• Locate an alarm in every room where someone sleeps with the door closed. The closed
door may prevent the alarm from waking the sleeper.
• Smoke, heat and combustion products rise to the ceiling and spread horizontally.
Mounting the smoke alarm on the ceiling in the centre of the room places it closest to all
points in the room. Ceiling mounting is preferred in ordinary residential construction.
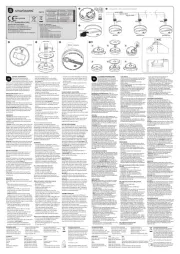
• When mounting an alarm on the ceiling, locate it at a minimum of 15cm (6”) from the side
wall and 60.96cm (2 feet) from any inside corner (see Diagram A).
!!
0306-7210-05_NB_CPD:_ 2018.9.20 2:15 PM Page 2

• Install smoke alarms on sloped, peaked or cathedral ceilings at or within 0.9m (3ft)
of the highest point (measured horizontally). Smoke alarms in rooms with ceiling
slopes greater than 0.3m in 2.4m (1 foot in 8 feet) horizontally shall be located on
the high side of the room. A row of detectors shall be spaced and located within
0.9m (3ft) of the peak of the ceiling measured horizontally.(see DIAGRAM "C")
• Put smoke alarms at both ends of a bedroom hallway or large room if the hallway
or room is more than 9.1m (30 feet) long.
• Install Smoke Alarms on tray-shaped ceilings (coffered ceilings) on the highest
portion of the ceiling or on the sloped portion of the ceiling within 12” (305mm)
vertically down from the highest point (see DIAGRAM "D").
BEDROOM
KITCHEN
BEDROOM
BEDROOM
LIVING ROOM
BEDROOM
SINGLE FLOOR PLAN
BEDROOM
MULTI FLOOR PLAN
BEDROOMHall
KITCHEN
LIVING
ROOM
BASSMENT
Smoke Alarms for Minimum Protection
Smoke Alarms for Maximum Protection
Smoke Alarms with “HUSH” Control
DIAGRAM “B”
DIAGRAM “A”
CEILING
6”
(15cm)
MINIMUM
4”
(10cm)
MINIMUM
NEVER HERE
BEST HERE
DEAD
AIR
SPACE
SIDE WALL
ANYWHERE ALONG
THIS BOLD SURFACE
12”
(300mm)
DIAGRAM “C”
DIAGRAM “D”
FIGURE3
FIGURE4
Push finger into battery box
when installing the battery
Install
Remove
Push
0306-7210-05_NB_CPD:_ 2018.9.20 2:15 PM Page 3
Produkspesifikasjoner
Merke: | Kidde |
Kategori: | Røykvarsler |
Modell: | 29D |
Trenger du hjelp?
Hvis du trenger hjelp med Kidde 29D still et spørsmål nedenfor, og andre brukere vil svare deg
Røykvarsler Kidde Manualer
6 September 2025
6 September 2025
6 September 2025
6 September 2025
6 September 2025
6 September 2025
6 September 2025
6 September 2025
6 September 2025
6 September 2025
Røykvarsler Manualer
- Røykvarsler Kogan
- Røykvarsler Somfy
- Røykvarsler EMOS
- Røykvarsler Heatit
- Røykvarsler Nexa
- Røykvarsler Qolsys
- Røykvarsler Nedis
- Røykvarsler Logilink
- Røykvarsler Drayton
- Røykvarsler SAVS
- Røykvarsler ESYLUX
- Røykvarsler Abus
- Røykvarsler AngelEye
- Røykvarsler Ferguson
- Røykvarsler First Alert
- Røykvarsler Alecto
- Røykvarsler Gloria
- Røykvarsler Smartwares
- Røykvarsler EQ-3
- Røykvarsler X-Sense
- Røykvarsler M-e
- Røykvarsler Pentatech
- Røykvarsler Cordes
- Røykvarsler Ei Electronics
- Røykvarsler FireAngel
- Røykvarsler DSC
- Røykvarsler Hochiki
- Røykvarsler REV
Nyeste Røykvarsler Manualer
6 September 2025
6 September 2025
3 September 2025
3 September 2025
3 September 2025
3 September 2025
3 September 2025
3 September 2025
3 September 2025
3 September 2025