Kidde 29HD Bruksanvisning

Les nedenfor 📖 manual på norsk for Kidde 29HD (10 sider) i kategorien Røykvarsler. Denne guiden var nyttig for 20 personer og ble vurdert med 4.5 stjerner i gjennomsnitt av 2 brukere

Side 1/10
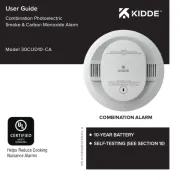
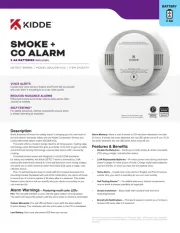
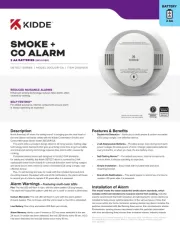
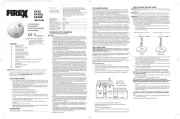
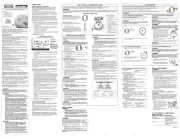
Photoelectric Smoke Alarm
User Guide
0306-7210-05 Rev.A
For 9 Volt Battery Operated Smoke Alarm
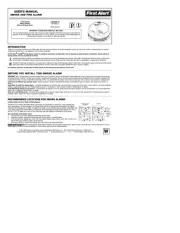
Thank you for purchasing this smoke alarm. It is an important part of your
family’s home safety plan. You can trust this product to provide the highest
quality safety protection. We know you expect nothing less when the lives of
your family are at stake.
Please take a few minutes to read this User Guide and save it for future reference.
Teach children how to respond to the alarms, and that they should never play
with the unit.
ATTENTION: Please take a few minutes to thoroughly read this User guide which
For model 29D,29HD
0786-CPD-20733
08
EN14604:2005
0306-7210-05_NB_CPD:_ 2018.9.20 2:15 PM Page 1
Do not try to repair the smoke alarm yourself. Refer to the instructions in Section 9 for
s
ervice.
W
W
W
W
WA
A
A
A
AR
R
R
R
RN
N
N
N
NI
I
I
I
IN
N
N
N
NG
G
G
G
G!
!
!
!
!
UNIT WILL NOT ATTACH TO MOUNTING PLATE UNLESS
B
ATTERY IS PRESENT. REMOVAL OF BATTERY WILL RENDER THE SMOKE
ALARM INOPERATIVE.
I
I
I
I
IM
M
M
M
MP
P
P
P
PO
O
O
O
OR
R
R
R
RT
T
T
T
TA
A
A
A
AN
N
N
N
NT
T
T
T
T!
!
!
!
!
READ ALL INSTRUCTIONS BEFORE INSTALLATION AND KEEP
THIS USER GUIDE NEAR THE ALARM FOR FUTURE REFERENCE.
CONTENTS OF THIS MANUAL
1 -- RECOMMENDED LOCATIONS FOR SMOKE ALARMS
2 -- LOCATIONS TO AVOID
3 -- INSTALLATION INSTRUCTIONS
4 -- OPERATION AND TESTING
5 -- HUSH CONTROL FEATURE
6 -- MAINTENANCE
7 -- LIMITATIONS OF SMOKE ALARMS
8 -- GOOD SAFETY HABITS
9 -- WARRANTY/SERVICE
1. RECOMMENDED LOCATIONS FOR ALARMS
Locate the first alarm in the immediate area of the sleeping rooms. Try to protect the exit
path as the sleeping rooms are usually farthest from the exit. If more than one sleeping
area exists, locate additional alarms in each sleeping area.
Locate additional alarms to protect any stairway as stairways act like chimneys for smoke
and heat.
Locate at least one alarm on every floor level.
Locate an alarm in every sleeping room.
Locate an alarm in every room where electrical appliances are operated (i.e. portable
heaters or humidifiers).
Locate an alarm in every room where someone sleeps with the door closed. The closed
door may prevent the alarm from waking the sleeper.
Smoke, heat and combustion products rise to the ceiling and spread horizontally.
Mounting the smoke alarm on the ceiling in the centre of the room places it closest to all
points in the room. Ceiling mounting is preferred in ordinary residential construction.
When mounting an alarm on the ceiling, locate it at a minimum of 15cm (6”) from the side
wall and 60.96cm (2 feet) from any inside corner (see Diagram A).
!
!
!
!
!
0306-7210-05_NB_CPD:_ 2018.9.20 2:15 PM Page 2
Install smoke alarms on sloped, peaked or cathedral ceilings at or within 0.9m (3ft)
of the highest point (measured horizontally). Smoke alarms in rooms with ceiling
slopes greater than 0.3m in 2.4m (1 foot in 8 feet) horizontally shall be located on
the high side of the room. A row of detectors shall be spaced and located within
0.9m (3ft) of the peak of the ceiling measured horizontally.(see DIAGRAM "C")
Put smoke alarms at both ends of a bedroom hallway or large room if the hallway
or room is more than 9.1m (30 feet) long.
Install Smoke Alarms on tray-shaped ceilings (coffered ceilings) on the highest
portion of the ceiling or on the sloped portion of the ceiling within 12” (305mm)
vertically down from the highest point (see DIAGRAM "D").
0306-7210-05_NB_CPD:_ 2018.9.20 2:15 PM Page 3
2. LOCATIONS TO AVOID
• In the garage. Products of combustion are present when you start your car.
• In front of forced air supply ducts used for heating and air conditioning, near ceiling
fans,or other high air flow areas.
• Less than 10cm (4”) from the peak of an ‘A’ frame type ceiling.
In an area where the temperature may fall below 0°C or rise above 40°C such as
garages and unfinished attics; this should also include electrical boxes exposed to
these environments..
• In dusty areas. Dust particles may cause nuisance alarm or failure to alarm.
• In very humid areas. Moisture or steam can cause nuisance alarms.
• In areas where the Relative Humidity (RH) is above 93%.
• Near fluorescent lights. Electronic “noise” may cause nuisance alarms.
• In insect infested areas
• Smoke alarms should not be installed within 0.9m (3ft) of the following: the door to
a kitchen, the door to a bathroom containing a tub or shower, ceiling or whole house
ventilating fans or other high air flow areas..
• Kitchens: Normal cooking may cause nuisance alarms. If a kitchen alarm is desired, it
should have an alarm silence feature or be a photoelectric type.
• Smoke alarms are not to be used with detector guards unless the combination larm
and guard) has been evaluated and found suitable for that purpose.
NOTE: This model is not suitable for use in recreational vehicles or boats.
FIGURE 3
FIGURE 4
Push finger into battery box
when installing the battery
Install
Remove
Push
0306-7210-05_NB_CPD:_ 2018.9.20 2:15 PM Page 4
3.INSTALLATION INSTRUCTIONS
CAUTION: THIS UNIT IS SEALED. THE COVER IS NOT REMOVABLE!
1). Remove the mounting plate from the back of the alarm by holding the mounting
plate and twist the alarm in the direction indicated by the “REMOVE” arrow see
Figure 6.
2). To ensure aesthetic alignment of the alarm with the hallway, the “A” line on the
mounting plate should be parallel with the hallway when ceiling mounting.
3). After selecting the proper smoke alarm location as described in Section 1, attach the
mounting plate to the ceiling as shown in Figure 4. Use the screws and anchors
provided to secure the mounting plate.
4). When installing the battery, press the battery reminder finger down into the battery
compartment and install the battery (see Figure 5).
CAUTION! IF THE BATTERY REMINDER FINGER IS NOT HELD DOWN IN
THE BATTERY COMPARTMENT BY THE BATTERY, THE UNIT WILL NOT
ATTACH TO THE MOUNTING BRACKET.
5). Alignment marks are provided on the edge of the trim plate and the alarm. After
installing the mounting plate, place the alarm on the mounting plate with the
alignment marks lined up. Twist the alarm in the direction indicated by the “ON”
arrow on the alarm cover (see Figure 6) until it locks in place.
6). Tamper Resist Feature: To make your smoke alarm tamper resistant, a tamper resist
feature has been provided. Activate the tamper resist feature by breaking out the
block in the trim ring (see Figure 7). When the blocks are broken out, the tamper
resist tab is allowed to engage the mounting bracket. Rotate the alarm onto the
mounting bracket until you hear the tamper resist tab snap into place, locking the
alarm on the mounting bracket. Using the tamper resist feature will help to deter
children and others from removing the alarm from bracket. NOTE: To remove the
alarm when the tamper resist tab is engaged, press down on the tamper resist tab
with a screwdriver, and rotate the alarm off of the bracket (see Figure 8).
CAUTION! EARLY WARNING FIRE DETECTION IS BEST ACHIEVED BY THE
INSTALLATION OF FIRE DETECTION EQUIPMENT IN ALL ROOMS AND AREAS OF
THE HOUSEHOLD AS FOLLOWS:
A SMOKE ALARM INSTALLED IN EACH SEPARATE SLEEPING AREA (see Figure 2
and Recommended Locations to Install the Alarm) AND HEAT OR SMOKE
ALARMS IN THE LIVING ROOM, DINING ROOM, KITCHEN, HALLWAYS, ATTIC,
BOILER ROOM, CLOSETS, UTILITY STORAGE ROOM, CELLAR, AND ATTACHED
GARAGE.
g
s
o
o
e
t
m
!
!
!
!
!
!
!
!
!
!
!
!
!
!
!
0306-7210-05_NB_CPD:_ 2018.9.20 2:15 PM Page 5

Produkspesifikasjoner

Merke: Kidde
Kategori: Røykvarsler
Modell: 29HD

Trenger du hjelp?

Hvis du trenger hjelp med Kidde 29HD still et spørsmål nedenfor, og andre brukere vil svare deg


Røykvarsler Kidde Manualer

Røykvarsler Manualer

Nyeste Røykvarsler Manualer