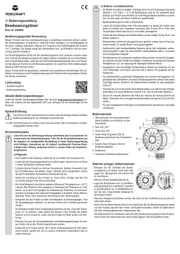
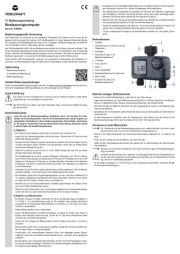
Biltema 14-1969 Bruksanvisning

Les nedenfor 📖 manual på norsk for Biltema 14-1969 (9 sider) i kategorien Vanningskontroll. Denne guiden var nyttig for 3 personer og ble vurdert med 4.5 stjerner i gjennomsnitt av 2 brukere

Side 1/9
© 2021-05-10 Biltema Nordic Services AB
Art. 14-1969
BEVATTNINGSTIMER
VANNINGSTIDSUR
KASTELUAJASTIN
VANDINGSTIMER
Biltema, Garnisonsgatan 26, 2nd FL, SE-254 66 Helsingborg. www.biltema.com
2
© 2021-05-10 Biltema Nordic Services AB
Art. 14-1969
SE
BEVATTNINGSTIMER
INSTALLATION OCH BYTE AV BATTERI
1. Använd 2 alkaliska AA-batterier (medföljer inte)
2. Öppna locket till batterifacket och sätt i batte-
rierna.
3. När batterinivån är låg kommer timern att stänga
av vattnet och batteriindikatorn blinkar.
4. Stäng av vattenkranen innan du öppnar batteri-
facket och byter batterier.
5. Dina inställningar försvinner när batterierna tas ur
och du behöver omprogrammera timern.
OBS! Använd inte laddningsbara batterier. Se till att
locket till batterifacket är ordentligt stängt så att inte
vatten kan komma in.
PROGRAMMERING OCH FUNKTIONER
1. Se till att batterierna är korrekt isatta
med rätt polaritet (+ och -).
2. Ställ in en bevattningscykel
Vrid reglaget för bevattningsfrekvens. Ställ indexpilen
vid önskad frekvens; 1, 2, 3, 4, 6, 8, 12, 24, 48, 72 tim-
mar samt en vecka.
OBS! Om reglaget redan är inställt på önskad frek-
vens måste reglaget vridas tillbaks och sedan vridas
på nytt till önskad frekvens. Detta görs för att timern
ska matcha den aktuella tiden.
3. Sll in hur länge bevattningen ska pågå
Vrid tidsvredet till önskad tid (nu är alla inställningar
klara).
r du har gjort ovanstående inställningar, kommer
timern att starta och öppna bevattningsventilen enligt
dina inställningar. När programmet är slut stänger
timern ventilen automatiskt.
4. Spara inställningarna
Skriv ner dina inställningar så att du har dem sparade
till nästa gång.
STÄNGA AV AUTOMATISK BEVATTNING
Vrid tidsvredet till "OFF"-läge för att stänga av
automatisk bevattning. I detta fall kommer timern att
memorera det inställda värdet för automatisk
bevattning, den kommer dock inte att starta pro-
grammet.
OBS! Om du vill återställa den automatiska bevatt-
ANVÄNDNINGSOMRÅDE
1. För utomhusbruk.
2. För vattentryck mindre än 6,9 bar (100 PSI).
3. För användning med vattentemperaturer som inte
är högre än 38 °C och inte lägre än 0 °C.
4. För användning på platser med bra dränering.
5. Placera inte timern i kontinuerligt solljus eftersom
höga temperaturer kan skada mekanismen.
6. Använd 2 x AA alkaliska batterier. Använd inte upp-
laddningsbara batterier.
ÖVERSIKT
2.During non-watering season (e.g. winter)
Turn off the faucet.
Remove the timer from the faucet.
Rotate
Duration control knob to "ON"
position so as to open the valve to drain
out water.
Remove the batteries. Dry the timer.
Store the timer in a dry place.
Anytime you may use manual watering
system to execute watering.
1. Rotate the Duration control knob to
the "ON" position. The timer will open the
valve for watering at once.
2. When you want to close the manual
watering, just rotate the Duration control
knob to the "OFF" position. The timer
will close the valve & stop watering.
1. Rotate the Frequency control knob to
Now position.( lf the original Frequency
control knob is on Now position, you need
to rotate the Frequency control knob to the
other one & adjust back to Now position.
This moving is to ensure the timer matches
the current time.)
2. Rotate Duration control knob to the
desired watering time.
NOTE:
lf you want to restore the
auto watering,anytime rotate the Duration
knob to the original location for automatic
watering system.
3. Set up running watering time.
Rotate the Duration knob to the desired
watering time. [ You have now completed
all the settings. ] When you have completed
the above settings, the timer will start working.
As it is up to the setup watering frequency, the
timer will automatically open the valve.
As the watering time is ended, the timer will
automatically close the valve.
1. Make sure batteries are installed correctly.
2. Set up watering cycle.
Rotate the watering frequency control knob
Set up the index arrow to the desired
location of watering frequency
(1.2.3.4.6.8.12.24.48.72 hour & 1 week).
lf the original setup of watering frequency is
on the desired location, you need to rotate
the knob to the other one & adjust back to
the desired location. This moving is to
ensure the timer matches the current time.
Performance specifications
1. For outdoor use
2. For water pressure less than 100 PSI
3. For use with water of temperatures no greater
than 100 or 38and no less
than
32or 0
4. For use in places with good drainage
5. Don't place in continuous direct sunlight where
high temperatures may damage mechanism.
6. Use 2 "AA" Alkaline, non-rechargable batteries.
Please read the instruction manual before
attempting to use this product.
25300
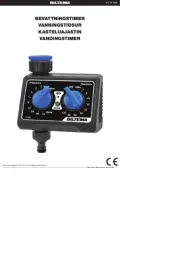
Controls and features
1. Water faucet connection
2. Hose connection
3. Battery compartment lid
4. Watering Frequency control knob
5. Watering Duration control knob
6. Manual watering control knob-
for instant watering
7. Low battery indicator
8. Rain Delay
A. CONTROLS:
B. FEATURES:
1. Available for 11 watering frequencies from
every hour to a week.
2. Available for 10 different watering
durations from oneminute to two hours
3. Manual watering for spontaneous
watering at any time
4. Manual shut-off for spontaneous close
any time
5. Available for auto close switch for single
watering
1. Use two AA type Alkaline batteries
( not included ).
2. Remove battery cover, install batteries.
3. When battery power is low, the timer will
close the water valve. The low battery
indicator will flash.
4. Turn off water before removing battery
cover and replacing batteries.
5. Settings will be lost when batteries are
replaced and must be reprogrammed.
Battery installation and replacement
1.Do not use rechargeable batteries.
2.Secure the battery lid tightly to
ensure the timer is completely
waterproof.
You may rotate the Duration knob to the
"OFF" position so as to shut down the auto
watering system, ln this case,the timer will
memorize the setting value on automatic
watering; however, the setting won't
be executed.
Program watering schedule
Shut down the auto watering system
When you have completely finished the
above setup, the timer will start working.
As the running time is over, the timer will
automatically close the valve.
Repeat the step 1 & 2 for next setup.
Auto close switch for single watering
Manual operation
When you have finished the manual watering,
you must rotate the Run Time control knob
to the original setup position for running
watering. ln this case, the timer may
be available for automatic watering system.
1. Make sure water faucet is
turned off and that proper
frequency and run time
are programmed. Close
the front cover securely.
2. Attach garden tap to top
of unit and garden
hose to bottom.
3.Turn on water faucet.
1.To set the number of rain delay hours,
press Delay button .
2.You can delay watering in 1 hourly intervals
only, up to maximum of 12 hrs. E.g. to delay
watering for 3 hours, depress the delay
button 3 times.
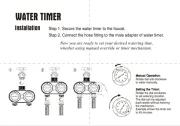
Installing the water timer
Rain Delay
Do not keep the timer on the faucet or
outdoors during cold weather.
Temperatures under 32(0)
may damage the timer.
Care and Maintenance
The timer should not be used in damp pits.
1.Watering season
4. Record your setup.
Make sure you have written your settings
down for future checking.
Enables all watering operations to be delay
from 1 hour to 12 hours.
25300
25300
1-Valve
Bio Electronic Timer
1. Krananslutning
2. Slanganslutning
3. Lock till batterifack
4. Vred för bevattningsfrekvens
5. Vred för bevattningstid
6. Knapp för inställning av manuell bevattning (ome-
delbar vattning)
7. Batteriindikator (blinkar vid låg batterinivå)
8. Knapp för regnfördröjning
EGENSKAPER
11 bevattningsfrekvenser från varje timme till en
vecka.
10 olika bevattningstider från en minut till två tim-
mar.
Manuell funktion för bevattning när som helst.
Manuell funktion för avstängning när som helst.
Förinställd automatisk avstängning.
3
© 2021-05-10 Biltema Nordic Services AB
Art. 14-1969
SE
INSTALLERA VATTENTIMERN
2.During non-watering season (e.g. winter)
Turn off the faucet.
Remove the timer from the faucet.
Rotate
Duration control knob to "ON"
position so as to open the valve to drain
out water.
Remove the batteries. Dry the timer.
Store the timer in a dry place.
Anytime you may use manual watering
system to execute watering.
1. Rotate the Duration control knob to
the "ON" position. The timer will open the
valve for watering at once.
2. When you want to close the manual
watering, just rotate the Duration control
knob to the "OFF" position. The timer
will close the valve & stop watering.
1. Rotate the Frequency control knob to
Now position.( lf the original Frequency
control knob is on Now position, you need
to rotate the Frequency control knob to the
other one & adjust back to Now position.
This moving is to ensure the timer matches
the current time.)
2. Rotate Duration control knob to the
desired watering time.
NOTE:
lf you want to restore the
auto watering,anytime rotate the Duration
knob to the original location for automatic
watering system.
3. Set up running watering time.
Rotate the Duration knob to the desired
watering time. [ You have now completed
all the settings. ] When you have completed
the above settings, the timer will start working.
As it is up to the setup watering frequency, the
timer will automatically open the valve.
As the watering time is ended, the timer will
automatically close the valve.
1. Make sure batteries are installed correctly.
2. Set up watering cycle.
Rotate the watering frequency control knob
Set up the index arrow to the desired
location of watering frequency
(1.2.3.4.6.8.12.24.48.72 hour & 1 week).
lf the original setup of watering frequency is
on the desired location, you need to rotate
the knob to the other one & adjust back to
the desired location. This moving is to
ensure the timer matches the current time.
Performance specifications
1. For outdoor use
2. For water pressure less than 100 PSI
3. For use with water of temperatures no greater
than 100 or 38and no less
than
32or 0
4. For use in places with good drainage
5. Don't place in continuous direct sunlight where
high temperatures may damage mechanism.
6. Use 2 "AA" Alkaline, non-rechargable batteries.
Please read the instruction manual before
attempting to use this product.
25300
Controls and features
1. Water faucet connection
2. Hose connection
3. Battery compartment lid
4. Watering Frequency control knob
5. Watering Duration control knob
6. Manual watering control knob-
for instant watering
7. Low battery indicator
8. Rain Delay
A. CONTROLS:
B. FEATURES:
1. Available for 11 watering frequencies from
every hour to a week.
2. Available for 10 different watering
durations from oneminute to two hours
3. Manual watering for spontaneous
watering at any time
4. Manual shut-off for spontaneous close
any time
5. Available for auto close switch for single
watering
1. Use two AA type Alkaline batteries
( not included ).
2. Remove battery cover, install batteries.
3. When battery power is low, the timer will
close the water valve. The low battery
indicator will flash.
4. Turn off water before removing battery
cover and replacing batteries.
5. Settings will be lost when batteries are
replaced and must be reprogrammed.
Battery installation and replacement
1.Do not use rechargeable batteries.
2.Secure the battery lid tightly to
ensure the timer is completely
waterproof.
You may rotate the Duration knob to the
"OFF" position so as to shut down the auto
watering system, ln this case,the timer will
memorize the setting value on automatic
watering; however, the setting won't
be executed.
Program watering schedule
Shut down the auto watering system
When you have completely finished the
above setup, the timer will start working.
As the running time is over, the timer will
automatically close the valve.
Repeat the step 1 & 2 for next setup.
Auto close switch for single watering
Manual operation
When you have finished the manual watering,
you must rotate the Run Time control knob
to the original setup position for running
watering. ln this case, the timer may
be available for automatic watering system.
1. Make sure water faucet is
turned off and that proper
frequency and run time
are programmed. Close
the front cover securely.
2. Attach garden tap to top
of unit and garden
hose to bottom.
3.Turn on water faucet.
1.To set the number of rain delay hours,
press Delay button .
2.You can delay watering in 1 hourly intervals
only, up to maximum of 12 hrs. E.g. to delay
watering for 3 hours, depress the delay
button 3 times.
Installing the water timer
Rain Delay
Do not keep the timer on the faucet or
outdoors during cold weather.
Temperatures under 32(0)
may damage the timer.
Care and Maintenance
The timer should not be used in damp pits.
1.Watering season
4. Record your setup.
Make sure you have written your settings
down for future checking.
Enables all watering operations to be delay
from 1 hour to 12 hours.
25300
25300
1-Valve
Bio Electronic Timer
1. Se till att vattenkranen är avstängd och att frek-
vens och tid är programmerade. Stäng batterilocket
ordentligt.
2. Anslut vattenkranen till timerns krananslutning på
ovansidan och anslut trädgårdsslangen till slangan-
slutningen på undersidan.
3. Öppna vattenkranen.
SKÖTSEL OCH UNDERLL
1. Sommarsäsong
Under sommaren kan timern sitta på vattenkranen
hela tiden
2. Vintersäsong
r du inte vattnar och utrustningen inte används,
till exempel på vintern. Stäng av vattenkranen och ta
bort timern från kranen. Vrid tidsvredet till "ON" så att
ventilen öppnas och släpper ut vattnet inuti timern.
Ta ut batterierna och torka av timern. Förvara timern
inomhus på en torr plats.
OBS! Låt inte timern sitta på vattenkranen vid kallt
väder. Temperaturer under 0 °C kan skada timern.
AVFALLSHANTERING
El-avfall
Förbrukade elektriska och elektroniska produk-
ter, däribland alla typer av batterier, ska lämnas till
avsett insamlingsställe för återvinning. (Enligt direktiv
2012/19/EU och 2006/66/EC).
ningen, rotera runt tidsvredet och sedan tillbaks till
den ursprungliga inställningen.
STÄNGA AV PÅGÅENDE BEVATTNING
1. Vrid frekvensvredet till NOW-positionen. Om regla-
get redan står i den positionen behöver du vrida runt
vredet och sedan tillbaks till NOW-positionen.
Detta görs för att säkerställa att timern matchar
aktuell tid.
2. Vrid tidsvredet till önskad bevattningstid.
r du är klar med ovanstående inställningar kommer
timern att starta. När programmet är slut stänger
timern vattenventilen automatiskt. Upprepa steg 1
och 2 för nästa inställning.
MANUELL ANVÄNDNING
Du kan när som helst använda manuell bevattning.
1. Vrid tidsvredet till läge "ON". Timern öppnar venti-
len och vattnet släpps på.
2. När du vill avsluta bevattningen, vrid tidsvredet till
"OFF"-läget. Timern stänger vattenventilen.
OBS! När du är klar med manuell bevattning kan du
vrida tillbaks tidsvredet till den ursprungliga inställ-
ningen för automatisk bevattning. Timern fortsätter
då enligt de automatiska inställningarna.
REGNFÖRDRÖJNING
Denna funktion innebär att du kan skjuta fram bevatt-
ningen från 1–12 timmar.
1. För att ställa in antal timmar med regnfördröjning,
tryck på knappen för regnfördröjning.
2. Du kan fördröja bevattningen med 1 timmes inter-
valler upp till max 12 timmar. Om du till exempel vill
fördröja bevattningen 3 timmar, tryck ner knappen för
regnfördröjning 3 gånger.

Produkspesifikasjoner

Merke: Biltema
Kategori: Vanningskontroll
Modell: 14-1969

Trenger du hjelp?

Hvis du trenger hjelp med Biltema 14-1969 still et spørsmål nedenfor, og andre brukere vil svare deg