First Alert SCO5 Bruksanvisning

Les nedenfor 📖 manual på norsk for First Alert SCO5 (7 sider) i kategorien Røykvarsler. Denne guiden var nyttig for 3 personer og ble vurdert med 4.5 stjerner i gjennomsnitt av 2 brukere

Side 1/7
Model SCO5
M08-0117-003 06/07 Printed in MexicoQ
IMPORTANT! PLEASE READ CAREFULLY AND SAVE.
This user’s manual contains important information
about your Combination Carbon Monoxide & Smoke
Alarm’
s operation. If you are installing this Alarm for
use by others, you must leave this manual—or a copy
of it—with the end user
TABLE OF CONTENTS
Introduction . . . . . . . . . . . . . . . . . . . . . . . . . . . . . . . . . . . . . . . . . . . . . . . . . . .
1
Fir . . . . . . . . . . . . . . . . . . . . . . . . . . . . . . . . . . . . . . . . . . . . .e Safety Tips 1
Basic Safety Information . . . . . . . . . . . . . . . . . . . . . . . . . . . . . . . . . . . . .1
Installation . . . . . . . . . . . . . . . . . . . . . . . . . . . . . . . . . . . . . . . . . . . . . . . . . . .1-2
Wher
e to Install This Alarm . . . . . . . . . . . . . . . . . . . . . . . . . . . . . . . . . .1-2
Where This Alarm Should NOT Be Installed . . . . . . . . . . . . . . . . . . . . . .2
How to Install This Alarm . . . . . . . . . . . . . . . . . . . . . . . . . . . . . . . . . . . . .2
Optional Locking Features . . . . . . . . . . . . . . . . . . . . . . . . . . . . . . . . . . . . . . .3
Weekly Testing . . . . . . . . . . . . . . . . . . . . . . . . . . . . . . . . . . . . . . . . . . . . . . . . .3
Regular Maintenance . . . . . . . . . . . . . . . . . . . . . . . . . . . . . . . . . . . . . . . . . . .4
If Your Smoke/CO Alarm Sounds . . . . . . . . . . . . . . . . . . . . . . . . . . . . . . . . . .4
What To Do First–Identify The Type Of Alarm . . . . . . . . . . . . . . . . . . . . .4
If the CO Alarm Sounds . . . . . . . . . . . . . . . . . . . . . . . . . . . . . . . . . . . . . .4
If the Smoke Alarm Sounds . . . . . . . . . . . . . . . . . . . . . . . . . . . . . . . . . . .4
Using the Silence Features . . . . . . . . . . . . . . . . . . . . . . . . . . . . . . . . . . .4
What You Need To Know About CO . . . . . . . . . . . . . . . . . . . . . . . . . . . . . . .5
What is CO? . . . . . . . . . . . . . . . . . . . . . . . . . . . . . . . . . . . . . . . . . . . . . . .5
Symptoms of CO Poisoning . . . . . . . . . . . . . . . . . . . . . . . . . . . . . . . . . .5
Potential Sources of CO in the Home . . . . . . . . . . . . . . . . . . . . . . . . . . .5
How Can I Protect My Family From CO Poisoning? . . . . . . . . . . . . . . . . . .5
Regulator . . . . . . . . . . . . . . . . . . . .5-6y Information For Smoke/CO Alarms
Regulatory Information for CO Alarms . . . . . . . . . . . . . . . . . . . . . . . . . . .5
Regulatory Information for Smoke Alarms . . . . . . . . . . . . . . . . . . . . . .5-6
Recommended Locations for Smoke Alarms . . . . . . . . . . . . . . . . . . .5-6
About Smoke Alarms . . . . . . . . . . . . . . . . . . . . . . . . . . . . . . . . . . . . . . . .6
Special Compliance Considerations
. . . . . . . . . . . . . . . . . . . . . . . . . . . . . . .
6
General Limitations Of Smoke/CO Alarms . . . . . . . . . . . . . . . . . . . . . . . .6-7
Troubleshooting Guide . . . . . . . . . . . . . . . . . . . . . . . . . . . . . . . . . . . . . . . . . .7
Limited W
arranty . . . . . . . . . . . . . . . . . . . . . . . . . . . . . . . . . . . . . . . . . . . . . .7
© 2007 BRK Brands, Inc., a Jar
den Corporation company (NYSE: JAH)
3901 Liberty Street Road, Aurora, IL 60504-8122 All rights reserved.
Consumer Affairs: (800) 323-9005 www.firstalert.com
INTRODUCTION
FIRE SAFETY TIPS
Follow safety rules and pr
event hazardous situations: 1) Use smoking
materials properly. Never smoke in bed. 2) Keep matches or lighters away
fr
om children; 3) Store flammable materials in proper containers; 4) Keep
electrical appliances in good condition and don’
t overload electrical circuits;
5) Keep stoves, barbecue grills, fireplaces and chimneys grease- and debris-
fr
ee; 6) Never leave anything cooking on the stove unattended; 7) Keep
portable heaters and open flames, like candles, away fr
om flammable
materials; 8) Don’t let rubbish accumulate.
Keep alarms clean, and test them weekly. Replace alarms immediately if
they ar
e not working properly. Smoke Alarms that do not work cannot alert
you to a fire. Keep at least one working fire extinguisher on every floor, and
an additional one in the kitchen. Have fire escape ladders or other reliable
means of escape fr
om an upper floor in case stairs are blocked.
BASIC SAFETY INFORMATION
Dangers, Warnings, and Cautions alert you to important
operating instr
uctions or to potentially hazardous situations.
Pay special attention to these items.
This Smoke/CO Alarm is approved for use in single-family
residences. It is NOT designed for marine or RV use.
This combination Smoke/Carbon Monoxide Alar
m has two separate
alar
ms. The CO Alarm is not designed to detect fire or any other
gas. It will only indicate the presence of carbon monoxide gas at
the sensor
. Carbon monoxide gas may be present in other areas.
The Smoke Alarm will only indicate the presence of smoke that
reaches the sensor. The Smoke Alarm is not designed to sense
gas, heat or flames.
This Smoke/CO Alarm cannot operate without working batteries.
Removing the batteries for any reason, or failing to replace the
batteries at the end of their service life, removes your protection.
NEVER ignor
e any alarm. See “If Your Smoke/CO Alarm Sounds”
for more information on how to respond to an alarm. Failure to
respond can result in injury or death.
The Silence Features are for your convenience only and will not
correct a problem. See "Using the Silence Features" for details.
Always check your home for a potential problem after any alarm.
Failure to do so can result in injury or death.
Test this Smoke/CO Alarm once a week. If the Alarm ever fails to
test correctly, have it replaced immediately! If the Alarm is not
working properly, it cannot alert you to a problem.
This product is intended for use in ordinary indoor locations of
family living units. It is not designed to measure CO levels in
compliance with Occupational Safety and Health Administration
(OSHA) commercial or industrial standards. Individuals with
medical conditions that may make them more sensitive to carbon
monoxide may consider using warning devices which provide
audible and visual signals for carbon monoxide concentrations
under 30 ppm. For additional information on carbon monoxide
and your medical condition contact your physician.
1
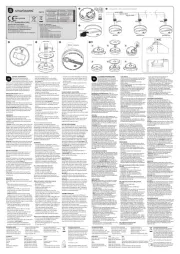
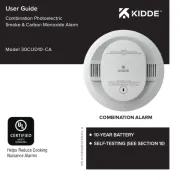
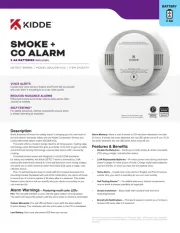
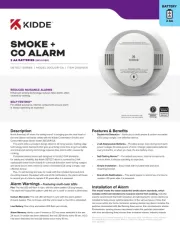
COMBINATION CARBON MONOXIDE & SMOKE ALARM
Featur
es:
Separate sensors to detect smoke
and CO; the two alarm systems
work independently
Powered by two “AA” batteries
Side access drawer for easy
battery replacement
All First Alert
®
Smoke Alarms conform to regulatory requirements,
including UL217 and ar
e designed to detect par
ticles of combustion.
Smoke par
ticles of varying number and size are produced in all fires.
Ionization technology is generally mor
e sensitive than photoelectric
technology at detecting small particles, which tend to be produced
in greater amounts by flaming fires, which consume combustible
materials rapidly and spr
ead quickly
. Sour
ces of these fir
es may include
paper burning in a wastebasket, or a grease fire in the kitchen.
Photoelectric technology is generally more sensitive than ionization
technology at detecting lar
ge particles, which tend to be pr
oduced in
greater amounts by smoldering fires, which may smolder for hours
before bursting into flame. Sources of these fires may include cigarettes
bur
ning in couches or bedding.
For maximum pr
otection, use both types of Smoke Alar
ms on each
level and in every bedroom of your home.
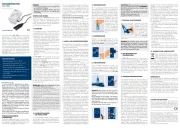
USER’S MANUAL
INSTALLATION
WHERE TO INST
ALL THIS ALARM
Minimum coverage for Smoke Alarms, as recommended by the National
Fir
e Pr
otection Association (NFP
A), is one Smoke Alarm on every floor
, in
every sleeping area, and in every bedroom (See “Regulatory Information For
Smoke Alarms” for details on the NFPA recommendations).
For CO Alarms, the National Fire Protection Association (NFPA) recommends
that a CO Alarm should be centrally located outside of each separate sleeping
area in the immediate vicinity of the bedrooms. For added protection, install
additional CO Alarms in each separate bedroom, and on every level of your
home.
NOTE: For added pr
otection, install an additional Smoke/CO Alarm at least
15 feet (4.6 meters) away from the furnace or fuel burning heat source where
possible. In smaller homes or in manufactured homes where this distance
cannot be maintained, install the Alarm as far away as possible from the furnace
or other fuel bur
ning sour
ce. Installing the Alarm closer than 15 feet (4.6 meters)
will not harm the Alarm, but may increase the frequency of unwanted alarms.
In general, install combination Smoke and Carbon Monoxide Alarms:
On every level of your home, including finished attics and basements.
Inside every bedroom, especially if people sleep with the door partly or
completely closed.
In the hall near every sleeping ar
ea. If your home has multiple sleeping
ar
eas, install a unit in each. If a hall is mor
e than 40 feet (12 meters) long,
install a unit at each end.
At the top of first-to-second floor stairs.
At the bottom of the basement stairs.
For additional coverage, install Alarms in all rooms, halls, and storage
areas, where temperatures normally remain between 40˚ F and 100˚ F
(4˚ C and 38˚ C).
RECOMMENDED PLACEMENT
When installing on the wall, the top edge of Smoke Alarms should be
placed between 4 inches (102 mm) and 12 inches (305 mm) from the
wall/ceiling line.
When installing on the ceiling, place the alarm as close to the
center as possible.
In either case, install at least 4 inches (102 mm) from where the wall and
ceiling meet. See “Avoiding Dead Air Spaces” for more information.
NOTE: For any location, make sure no door or other obstruction could keep
carbon monoxide or smoke fr
om reaching the Alarm.
Installing Smoke/CO Alar
ms in Mobile Homes
For minimum security install one Smoke/CO Alarm as close to each sleeping
area as possible. For more security, put one unit in each room. Many older
mobile homes (especially those built befor
e 1978) have little or no insulation.
If your mobile home is not well insulated, or if you are unsure of the amount
of insulation, it is important to install units on inside walls only
WHERE THIS ALARM SHOULD NOT BE INSTALLED
Do NOT locate this Smoke/CO Alarm:
In garages, furnace rooms, crawl spaces and unfinished attics. Avoid
extremely dusty, dirty or greasy areas.
Where combustion particles are produced. Combustion particles form
when something burns. Areas to avoid include poorly ventilated kitchens,
garages, and fur ooms. Keep units at least 20 feet (6 meters) frnace r om
the sources of combustion particles (stove, furnace, water heater, space
heater) if possible. In areas where a 20-foot (6 meter) distance is not
possible in modular, mobile, or smaller homes, for example it is
recommended the Smoke Alarm be placed as far from these fuel-burning
sources as possible. The placement recommendations are intended to
keep these Alarms at a reasonable distance from a fuel-burning source,
and thus reduce “unwanted” alarms. Unwanted alarms can occur if a
Smoke Alarm is placed directly next to a fuel-burning source. Ventilate
these areas as much as possible.
Within 5 feet (1.5 meters) of any cooking appliance. In air streams near
kitchens. Air currents can draw cooking smoke into the smoke sensor
and cause unwanted alarms.
In extremely humid areas. This Alarm should be at least 10 feet (3 meters)
from a shower, sauna, humidifier, vaporizer, dishwasher, laundry room,
utility room, or other source of high humidity.
In direct sunlight.
In turbulent air, like near ceiling fans or open windows. Blowing air may
pr
event CO or smoke fr
om r
eaching the sensors.
In areas where temperature is colder than 40˚ F (4˚ C) or hotter than 100˚F
(38˚ C). These ar
eas include non-air
conditioned crawl spaces, unfinished
attics, uninsulated or poorly insulated ceilings, porches, and garages.
In insect infested areas. Insects can clog the openings to the sensing
chamber.
Less than 12 inches (305 mm) away from fluorescent lights. Electrical
“noise” can interfer
e with the sensor
In “dead air” spaces. See “A
voiding Dead Air Spaces”.
A
VOIDING DEAD AIR SP
ACES
“Dead air” spaces may pr
event smoke fr
om r
eaching the Smoke/CO Alarm.
T
o avoid dead air spaces, follow installation recommendations below.
On ceilings, install Smoke/CO Alarms as close to the center of the ceiling as
possible. If this is not possible, install the Smoke/CO Alarm at least 4 inches
(102 mm) from the wall or corner.
For wall mounting (if allowed by building codes), the top edge of Smoke/CO
Alarms should be placed between 4 inches (102 mm) and 12 inches (305 mm)
fr
om the wall/ceiling line, below typical “dead air” spaces.
On a peaked, gabled, or cathedral ceiling, install first Smoke/CO Alarm
within 3 feet (0.9 meters) of the peak of the ceiling, measured horizontally.
Additional Smoke/CO Alarms may be required depending on the length, angle,
etc. of the ceiling's slope. Refer to NFPA 72 for details on requirements for
sloped or peaked ceilings.
HOW TO INST
ALL THIS ALARM
This combination Smoke/CO Alarm was designed to be mounted on the
ceiling or wall. It is not a tabletop device.
You must install this device on the
ceiling or wall as outlined below
. Read “Where To Install This Alarm” before
starting.
T
ools you will need:
pencil, drill with 3/16” or 5mm drill bit,
flathead scr
ewdriver, hammer.
Do not connect this unit to any other alarm or auxiliary device. It is a
single-station unit that cannot be linked to other devices. Connecting
anything else to this unit may pr
event it from working properly.
Do not install this unit over an electrical junction box. Air currents
around junction boxes can prevent smoke from reaching the sens-
ing chamber and prevent the unit from alarming. Only AC powered
units ar
e intended for installation over junction boxes.
If you want to lock the batter
y compartment, or lock the Smoke/CO
Alarm to the mounting bracket, please read the “Optional Locking
Featur
es” section.
1. Hold base firmly and twist the mounting bracket counterclockwise (left) to
separate it from the unit.
2. Hold the mounting bracket against the ceiling (or wall) so the vertical
mounting slot is aligned in the 12 o’clock position and trace around the
inside of the mounting slots (vertical and horizontal mounting).
3. Put the unit where it won’t get covered with dust when you drill the
mounting holes.
4. Using a 3/16” (5 mm) drill bit, drill a hole through the center of the oval
outlines you traced.
5. Insert the plastic screw anchors (in the plastic bag with screws) into the
holes. Tap the screw anchors gently with a hammer, if necessary, until
they are flush with the ceiling or wall.
6. Line the mounting bracket up over the plastic screw anchors.
7. Screw the mounting bracket to the ceiling or wall through the mounting
slots using the two screws provided.
8. Before attaching the Alarm to
the bracket, insert the two (2)
AA batteries (included) into the
battery compartment. Match
the terminals on the end of the
battery with the terminals on
the unit. Match “+” to “+” and
“-” to “-.” If the batteries are
not fully inserted, the unit
cannot r
eceive battery power
NOTE: The unit may beep briefly when you install the batteries. This is normal.
The GREEN Light flashes about every 60 seconds when the unit is
receiving battery power.
The battery door will resist closing unless batteries are installed. This
war
ns you the unit will not operate without batteries.
9. Attach the Smoke/CO Alarm to the
mounting bracket. Line up the guides on
the alarm’s base with the guides on the
mounting bracket. When guides are lined
up, turn the base clockwise (right) until it
snaps into place.
NOTE: Once the Smoke/CO Alar
m is
snapped onto the mounting bracket,
you can rotate the Smoke/CO Alarm
to adjust the alignment.
10. Test the Smoke/CO Alarm. See “Weekly Testing” for details.
S
UGGESTED AREAS FOR INSTALLING 
SMOKE ALARMS, CO ALARMS, AND COMBO UNITS
SMOKE ALARM WITH 
SILENCE FEATURE
CO ALARMS
BOTH, OR COMBINATION 
SMOKE/CO ALARMS
SMOKE ALARMS
KEY:
S
uggested locations are based on
NFPA recommendations (NFPA 72 
for Smoke Alarms and NFPA 720 for
Carbon Monoxide Alarms). Always 
refer to national and local codes 
before beginning any installation.
In new construction AC and AC/DC smoke alarms MUST
be interconnected to meet NFPA recommendations.
PARTS OF THIS SMOKE/CO ALARM
1 Test/Silence Button
2
Battery Compartment
3
Power/Smoke Alarm LED
4
CO Alarm LED
2
3
TO LOCK THE BATTERY COMPARTMENT
Do not lock the batter
y compartment until you
activate the batter
y and test the Smoke/CO
Alarm.
1. Install the batteries befor
e attaching the Alarm
to the bracket. Insert the two (2) AA batteries
(included) into the battery compartment. Match
the terminals on the end of the battery with the
terminals on the unit. Match “+” to “+” and “-”
to “-.” If the batteries are not fully inserted, the
unit cannot r
eceive battery power.
2.
Push and hold Test/Silence button until the
alarm sounds.
If the unit does not alarm during testing, DO
NOT lock the battery compartment! Install new
batteries and test again. If the unit still does
not alarm, replace it immediately.
3.
Using needle-nose pliers or a utility knife,
detach one locking pin from the mounting
bracket.
4. Push the locking pin through the hole near
the battery door latch on the back of the
Smoke/CO Alarm.
OPTIONAL LOCKING FEA
TURES
TO LOCK THE MOUNTING BRACKET
1. Using needle-nose pliers or a utility knife,
detach one locking pin from the mounting
bracket.
2. Insert the locking pin through the hole
on the back of the Smoke/CO Alarm as
shown in the diagram.
3. When you attach the Smoke/CO Alarm to
the mounting bracket, the locking pin’s
head will fit into a notch on the bracket.
The optional locking featur
es are designed to discourage unauthorized removal of the batteries or Alarm. It is not necessary to activate the locks in
single-family households where unauthorized battery or Alarm removal is not a concern.
This Smoke/CO Alarm has two separate locking features: one to lock the battery compartment, and the other to lock the Smoke/CO Alarm to the mounting bracket.
Y
ou can choose to use either feature independently, or use them both.
T
ools you will need: Needle-nose pliers or utility knife Standard flathead screwdriver.
Both locking featur
es use locking pins, which are molded into the mounting bracket. Depending on which locking features you
use, r
emove one or both pins from the mounting bracket using needle-nose pliers or a utility knife.
T
o permanently remove either locking pin, insert a flathead screwdriver between the locking pin and the lock, and pry
the pin out of the lock.
TO UNLOCK THE BA
TTERY COMPARTMENT
1.
Remove the Smoke/CO Alarm from the
mounting bracket. If the unit is locked to
the bracket, see the section “To Unlock
the Mounting Bracket.”
2.
Insert a flathead screwdriver under the
head of the locking pin, and gently pry it out
of the battery compartment lock. (If you plan
to r
elock the battery compartment, save the
locking pin.)
3. To relock the battery compartment, close
the battery door and r
einsert locking pin in
lock.
4.
Reattach the Smoke/CO Alarm to the
mounting bracket.
When replacing the batteries, always test
the Smoke/CO Alarm before relocking the
battery compartment.
TO UNLOCK THE MOUNTING BRACKET
1. Insert a flathead screwdriver into the
rectangular cut-out on the mounting
bracket nearest to the locking pin.
2. Pry the Smoke/CO Alarm away from the
bracket by pushing up on the screwdriver and
turning the Smoke/CO Alarm counterclockwise
(left) at the same time.
WEEKLY TESTING
NEVER use an open flame of any kind to test this unit. You might
accidentally damage or set fir
e to the unit or to your home. The
built-in test switch accurately tests the unit’
s operation as r
equired
by Underwriters Laboratories, Inc. (UL). NEVER use vehicle exhaust!
Exhaust may cause per
manent damage and voids your warranty.
DO NOT stand close to the Alarm when the horn is sounding.
Exposur
e at close range may be har
mful to your hearing. When
testing, step away when horn starts sounding.
It is impor
tant to test this unit every week to make sure it is working
properly. Using the test button is the recommended way to test this
Smoke/CO Alarm.
Y
ou can test this Smoke/CO Alar
m:
Pr
ess and hold the T
est/Silence button
3-5 seconds until unit starts to alarm.
During testing, you will see and hear the following sequence:
The
Hor
n
will sound 3 beeps, pause, 3 beeps. The Power/Smoke LED
flashes Red and the CO LED will be Off.
Next the
Horn will sound 4 beeps, pause, 4 beeps. The Power/Smoke
LED will be Of
f and the
CO LED flashes Red.
If the unit does not alarm, make sure the batteries are correctly installed,
and test again. If the unit still does not alarm, replace it immediately.

Produkspesifikasjoner

Merke: First Alert
Kategori: Røykvarsler
Modell: SCO5

Trenger du hjelp?

Hvis du trenger hjelp med First Alert SCO5 still et spørsmål nedenfor, og andre brukere vil svare deg


Røykvarsler First Alert Manualer

Røykvarsler Manualer

Nyeste Røykvarsler Manualer