CRUX VRFBM-77C Bruksanvisning
CRUX
Ikke kategorisert
VRFBM-77C
Les nedenfor 📖 manual på norsk for CRUX VRFBM-77C (12 sider) i kategorien Ikke kategorisert. Denne guiden var nyttig for 25 personer og ble vurdert med 4.5 stjerner i gjennomsnitt av 13 brukere
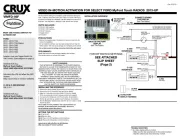
Side 1/12

• With OE type Dynamic Parking Guide Lines
• On-screen display and setup
• 2 trigger outputs (+12V max. 1A), separately adjustable switching events (CAN, ACC,
rear-view camera, reverse gear)
• Rear-view camera input
• Front camera input
• Front camera input can also be used as an Auxiliary Video Input
• Automatic switching to rear-view camera input on engagement of reverse gear from all
operation modes
• Forced rear-view camera option (only on vehicles with PDC button)
• Manual return from rear-view and front camera (cancellation of automatic switching)
• Picture-in-picture mode combining after-market rear-view and front camera picture(s)
with factory parking sensor graphics
• Compatible with all factory video accessories (e.g. rear-view camera, DVD-changer, etc.)
• Plug & Play installation
• For the F-series BMW with navigation system or radio and 6.5”, 7”, 8.8” or 10.25”
monitor with 4+2pin HSD2 LVDS connector
• On i3 installations, part# HAR-i3 is required to install the interface. The interface module
is installed/mounted under the rear seat and you will need to run the HAR-i3 towards
the rear seat.
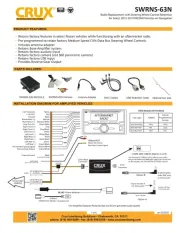
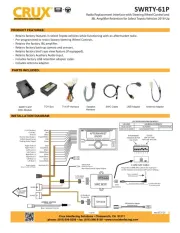
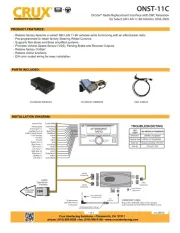
BM-77C Module
BM-77C Harness
4+2 PIN HSD2 LVDS Cable
Power/CAN Harness
1 / 12
rev.122617
Produkspesifikasjoner
| Merke: | CRUX |
| Kategori: | Ikke kategorisert |
| Modell: | VRFBM-77C |
Trenger du hjelp?
Hvis du trenger hjelp med CRUX VRFBM-77C still et spørsmål nedenfor, og andre brukere vil svare deg
Ikke kategorisert CRUX Manualer
17 Oktober 2025
16 Oktober 2025
16 Oktober 2025
16 Oktober 2025
16 Oktober 2025
15 Oktober 2025
15 Oktober 2025
15 Oktober 2025

11 Mars 2025
11 Mars 2025
Ikke kategorisert Manualer
- Baby Lock
- Plasma Cloud
- Sportime
- Xigmatek
- ESI
- Baby Jogger
- Morley
- Ekko
- Advance
- Manfrotto
- Megasat
- Sedona
- DoorBird
- Comet
- SoundTube
Nyeste Ikke kategorisert Manualer

23 Oktober 2025

23 Oktober 2025

23 Oktober 2025

23 Oktober 2025

23 Oktober 2025

23 Oktober 2025

23 Oktober 2025

23 Oktober 2025

23 Oktober 2025

23 Oktober 2025